
Auto RUM injection
Real User Monitoring (RUM) helps you track and analyze how users experience your website or web application in real time. Using the Auto RUM Injection feature, you can add RUM monitors along with APM agents.
| Agent | Supported versions |
|---|---|
| Java | Versions 6.4 and above |
| PHP | Versions 4.4 and above |
| .NET | Versions 7.1.0 and above |
- You must explicitly enable the Enable RUM Auto Injection option.
- Auto RUM Injection is currently supported only for Java Server Pages (JSPs).
Use case
Consider an APM user who wants to add a RUM monitor to observe an application's performance along with its APM metrics. In this case, the user must manually add RUM monitors by configuring monitor details; copying and pasting the generated script into their application code; and mapping the RUM monitor to the APM application.
With Auto RUM Injection feature, the APM agent automatically injects the RUM script into supported HTML responses when the feature is enabled, eliminating the need for manual code changes or redeployment.
How Auto RUM Injection works
Site24x7's APM agent identifies supported application environments (Java, .NET, or PHP) and detects outgoing HTML responses sent from the server to end users.
When the Enable RUM Auto Injection option is enabled for the APM application, the agent injects the RUM script into the relevant HTML page before the response reaches the user’s browser.
This script then loads on the user's browser and collects real user performance metrics, including Total PageLoads, Average Response Time, and other front-end performance data.
The RUM script is injected only for applications with a Content-Type of text/html in the response header (visible in the Network tab of the browser debugging tools).
Adding RUM monitors using Auto RUM Injection
- Install the respective APM (Java , .NET, or PHP ) agent for your Application.
- After a successful installation, navigate to APM > APM Insight > Applications. The APM monitor will be configured with the specified name.
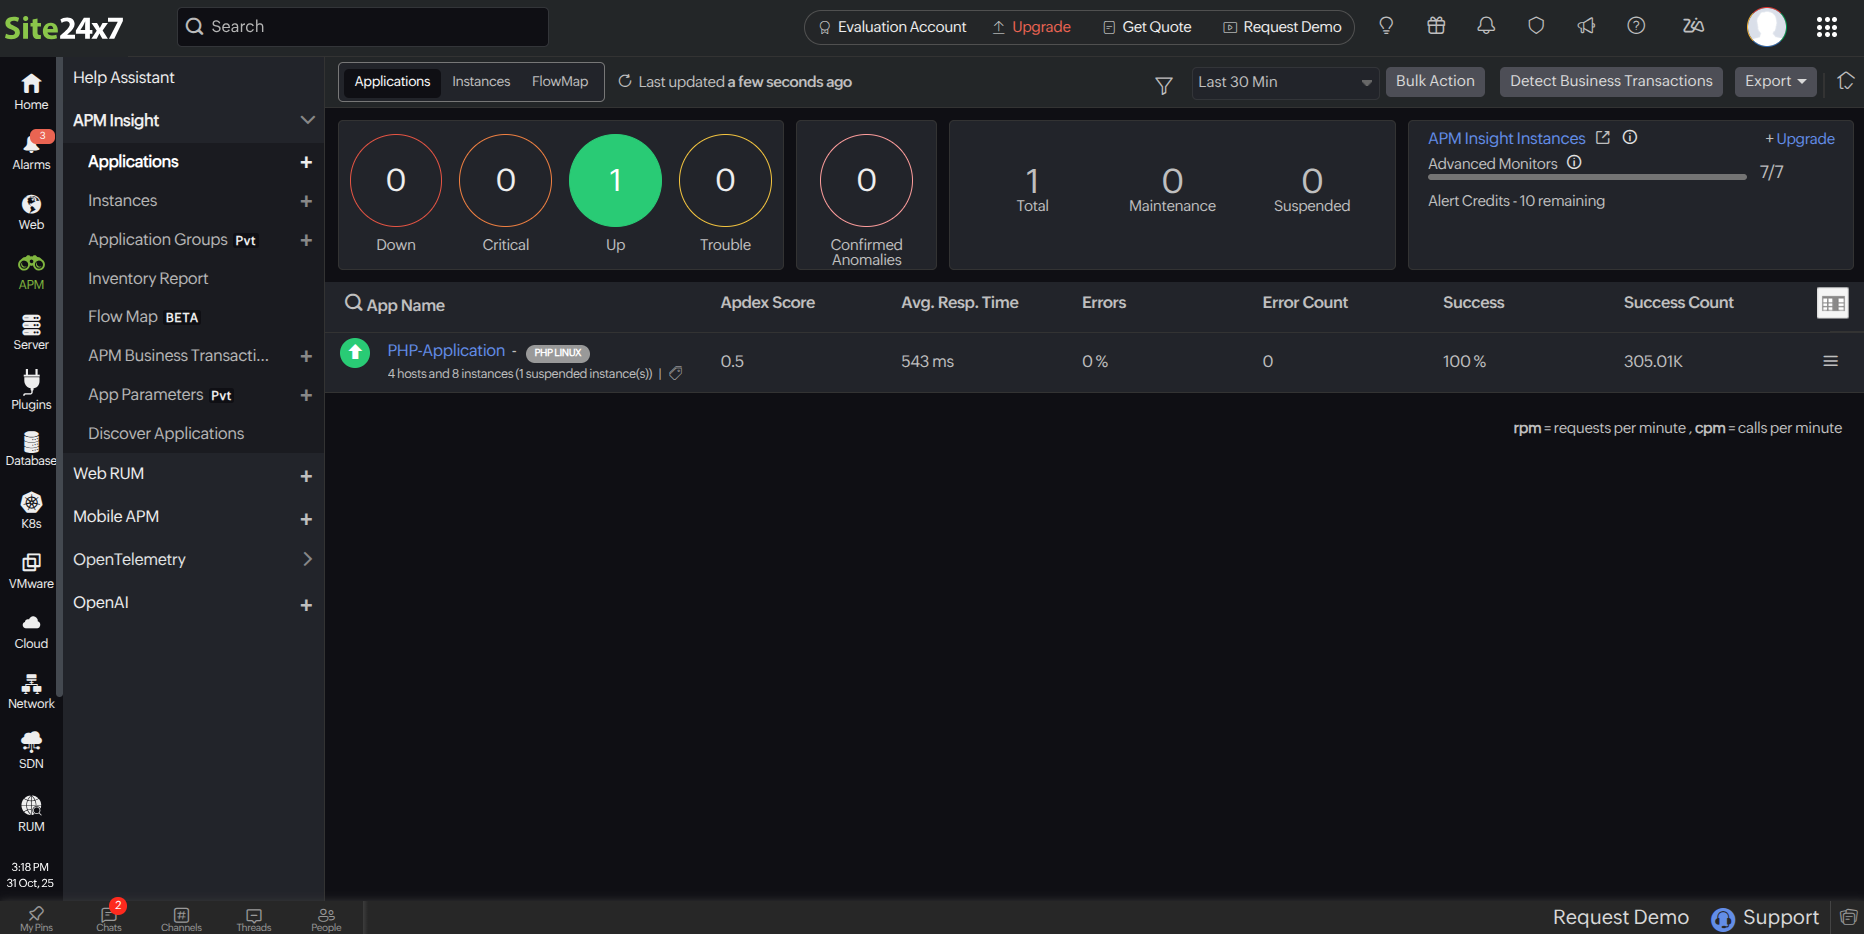
Figure 1. APM monitor added inside Applications.
- Edit the APM application and enable Auto RUM Injection:
Navigate to APM > APM Insight > <your_application> > Edit > Edit APM Insight Application. - Set the Enable RUM Auto Injection option to Yes.
NoteBy default, the Enable RUM Auto Injection option is set to No. A RUM monitor will be created only after this option is set to Yes.
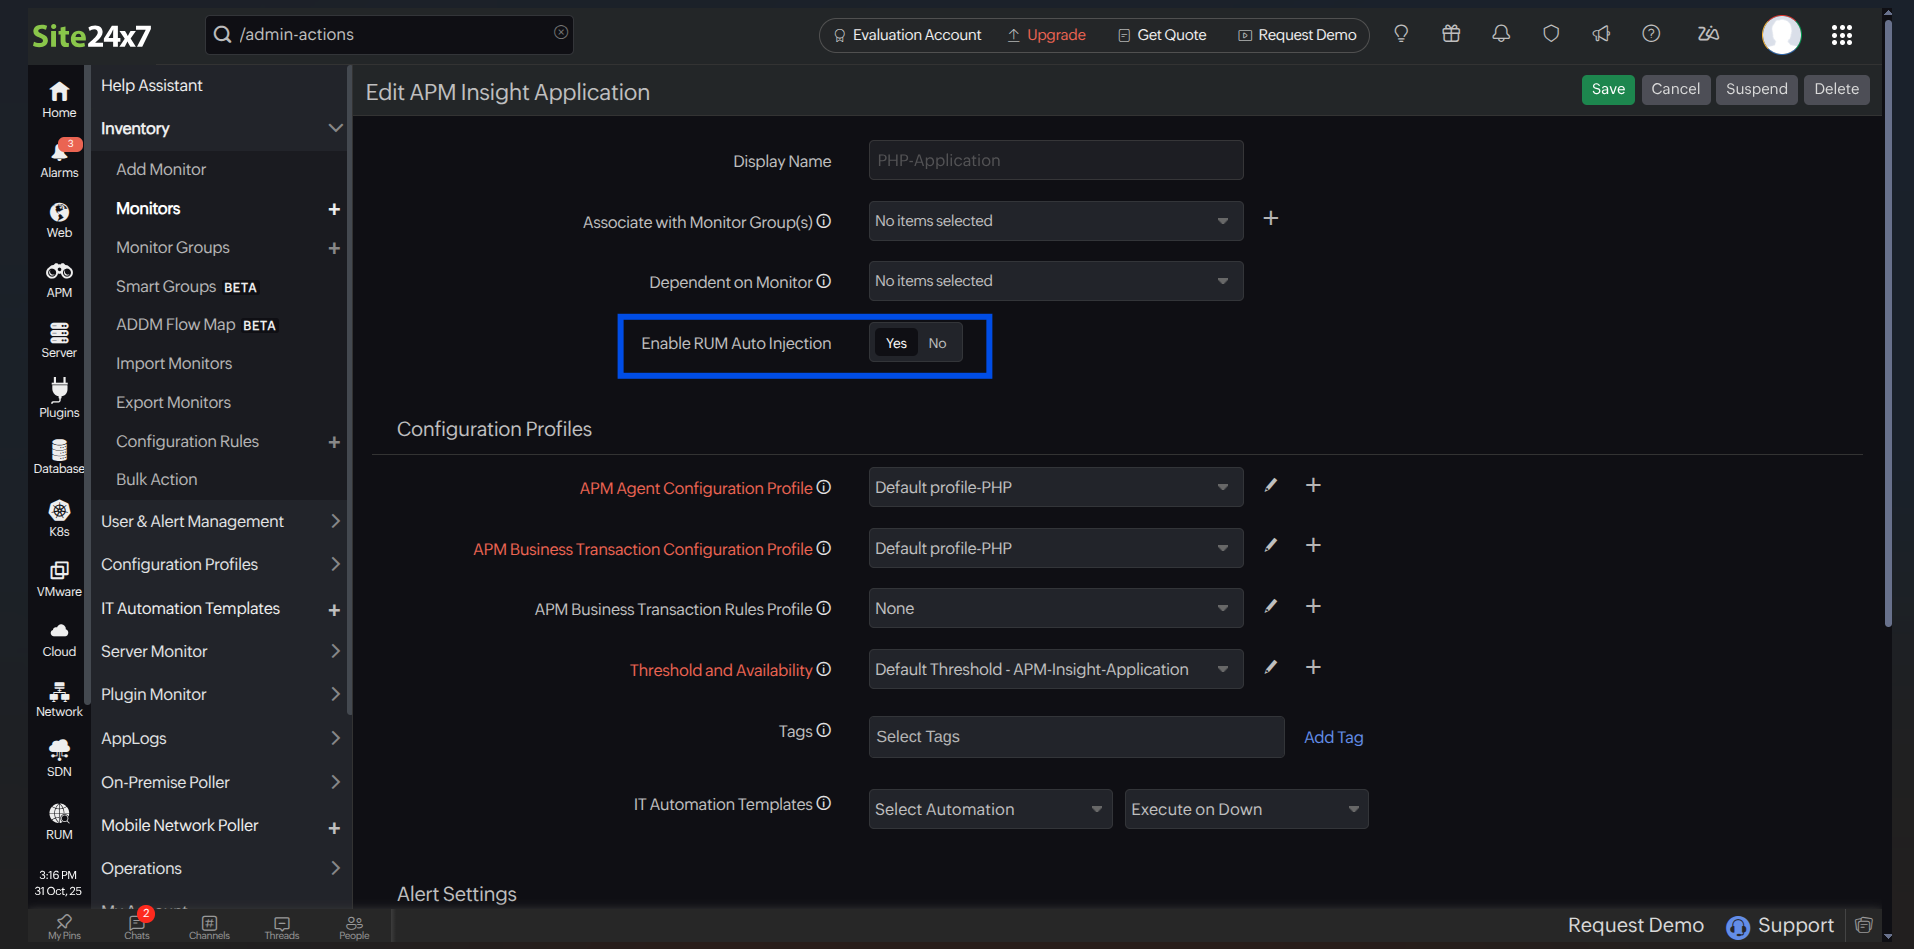 Figure 2. Edit APM Insight Application screen
- Once enabled, the RUM monitor will be automatically created and mapped to the APM application.
- To view the RUM monitor, click the Web RUM tab. The RUM monitor will follow the naming format:
<APM_name>-RUM.
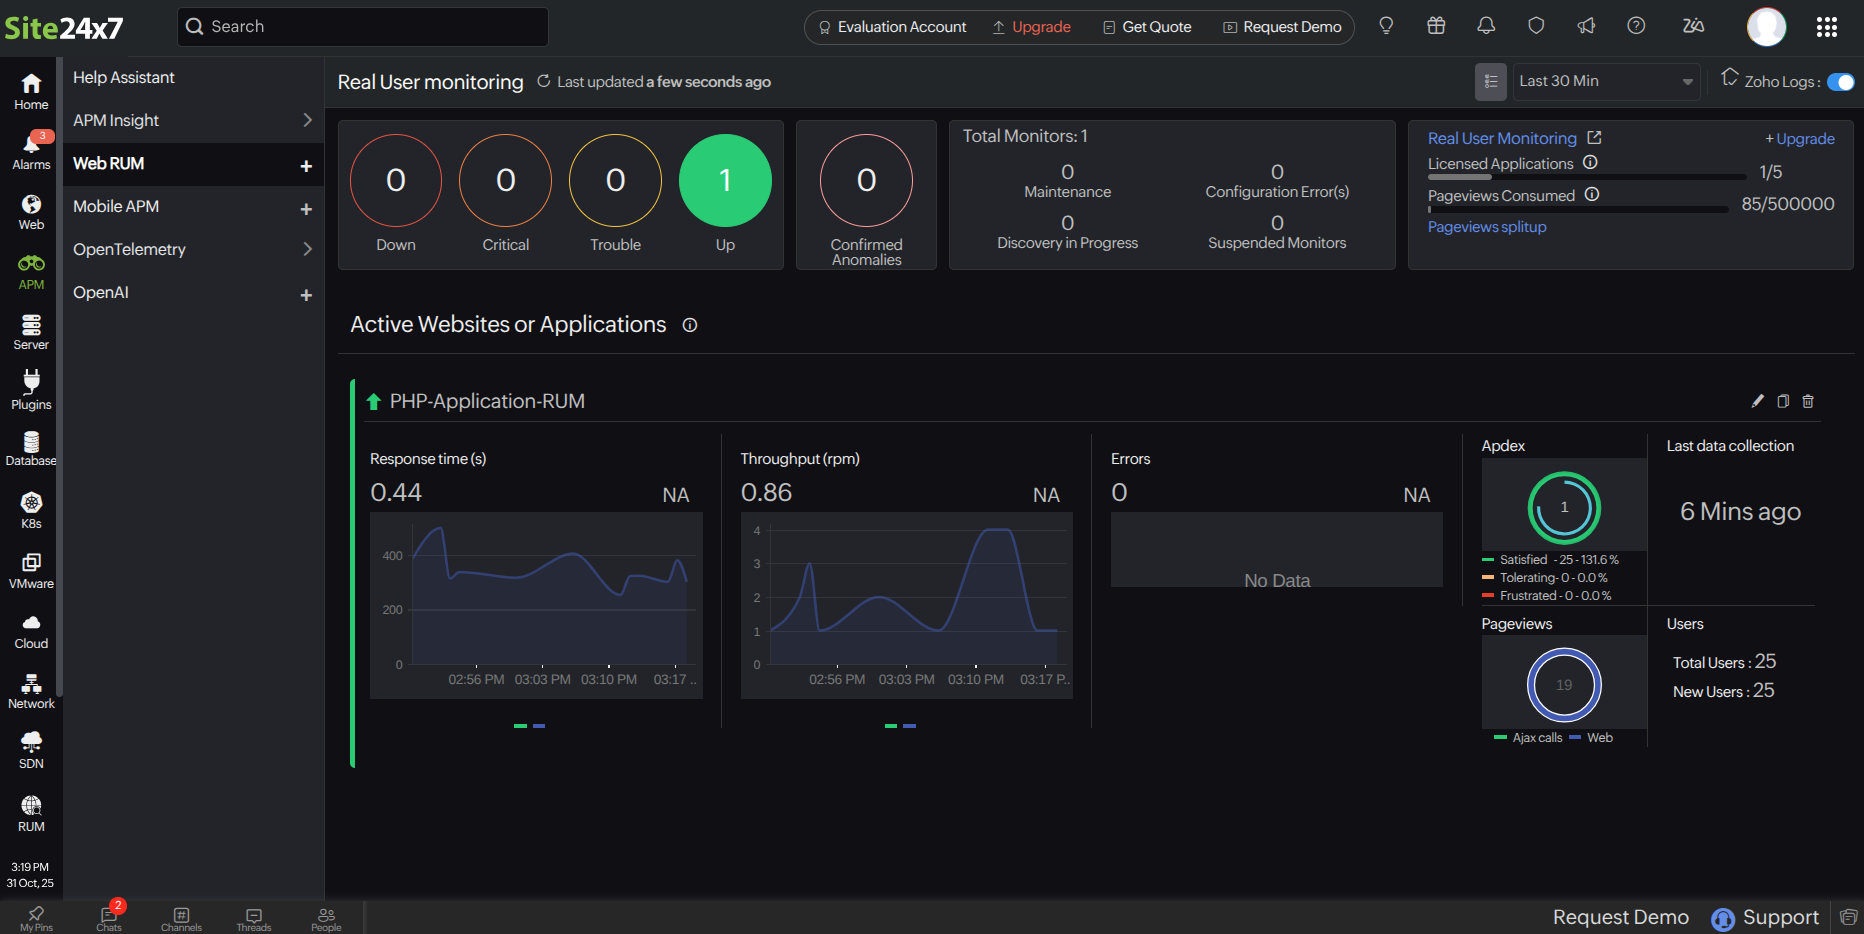 Figure 3. RUM monitor added automatically inside Web RUM.
Accessing RUM widgets
You can view the RUM metrics inside your Application's dashboard under the Overview and RUM Analytics tabs, as well as in the RUM module.
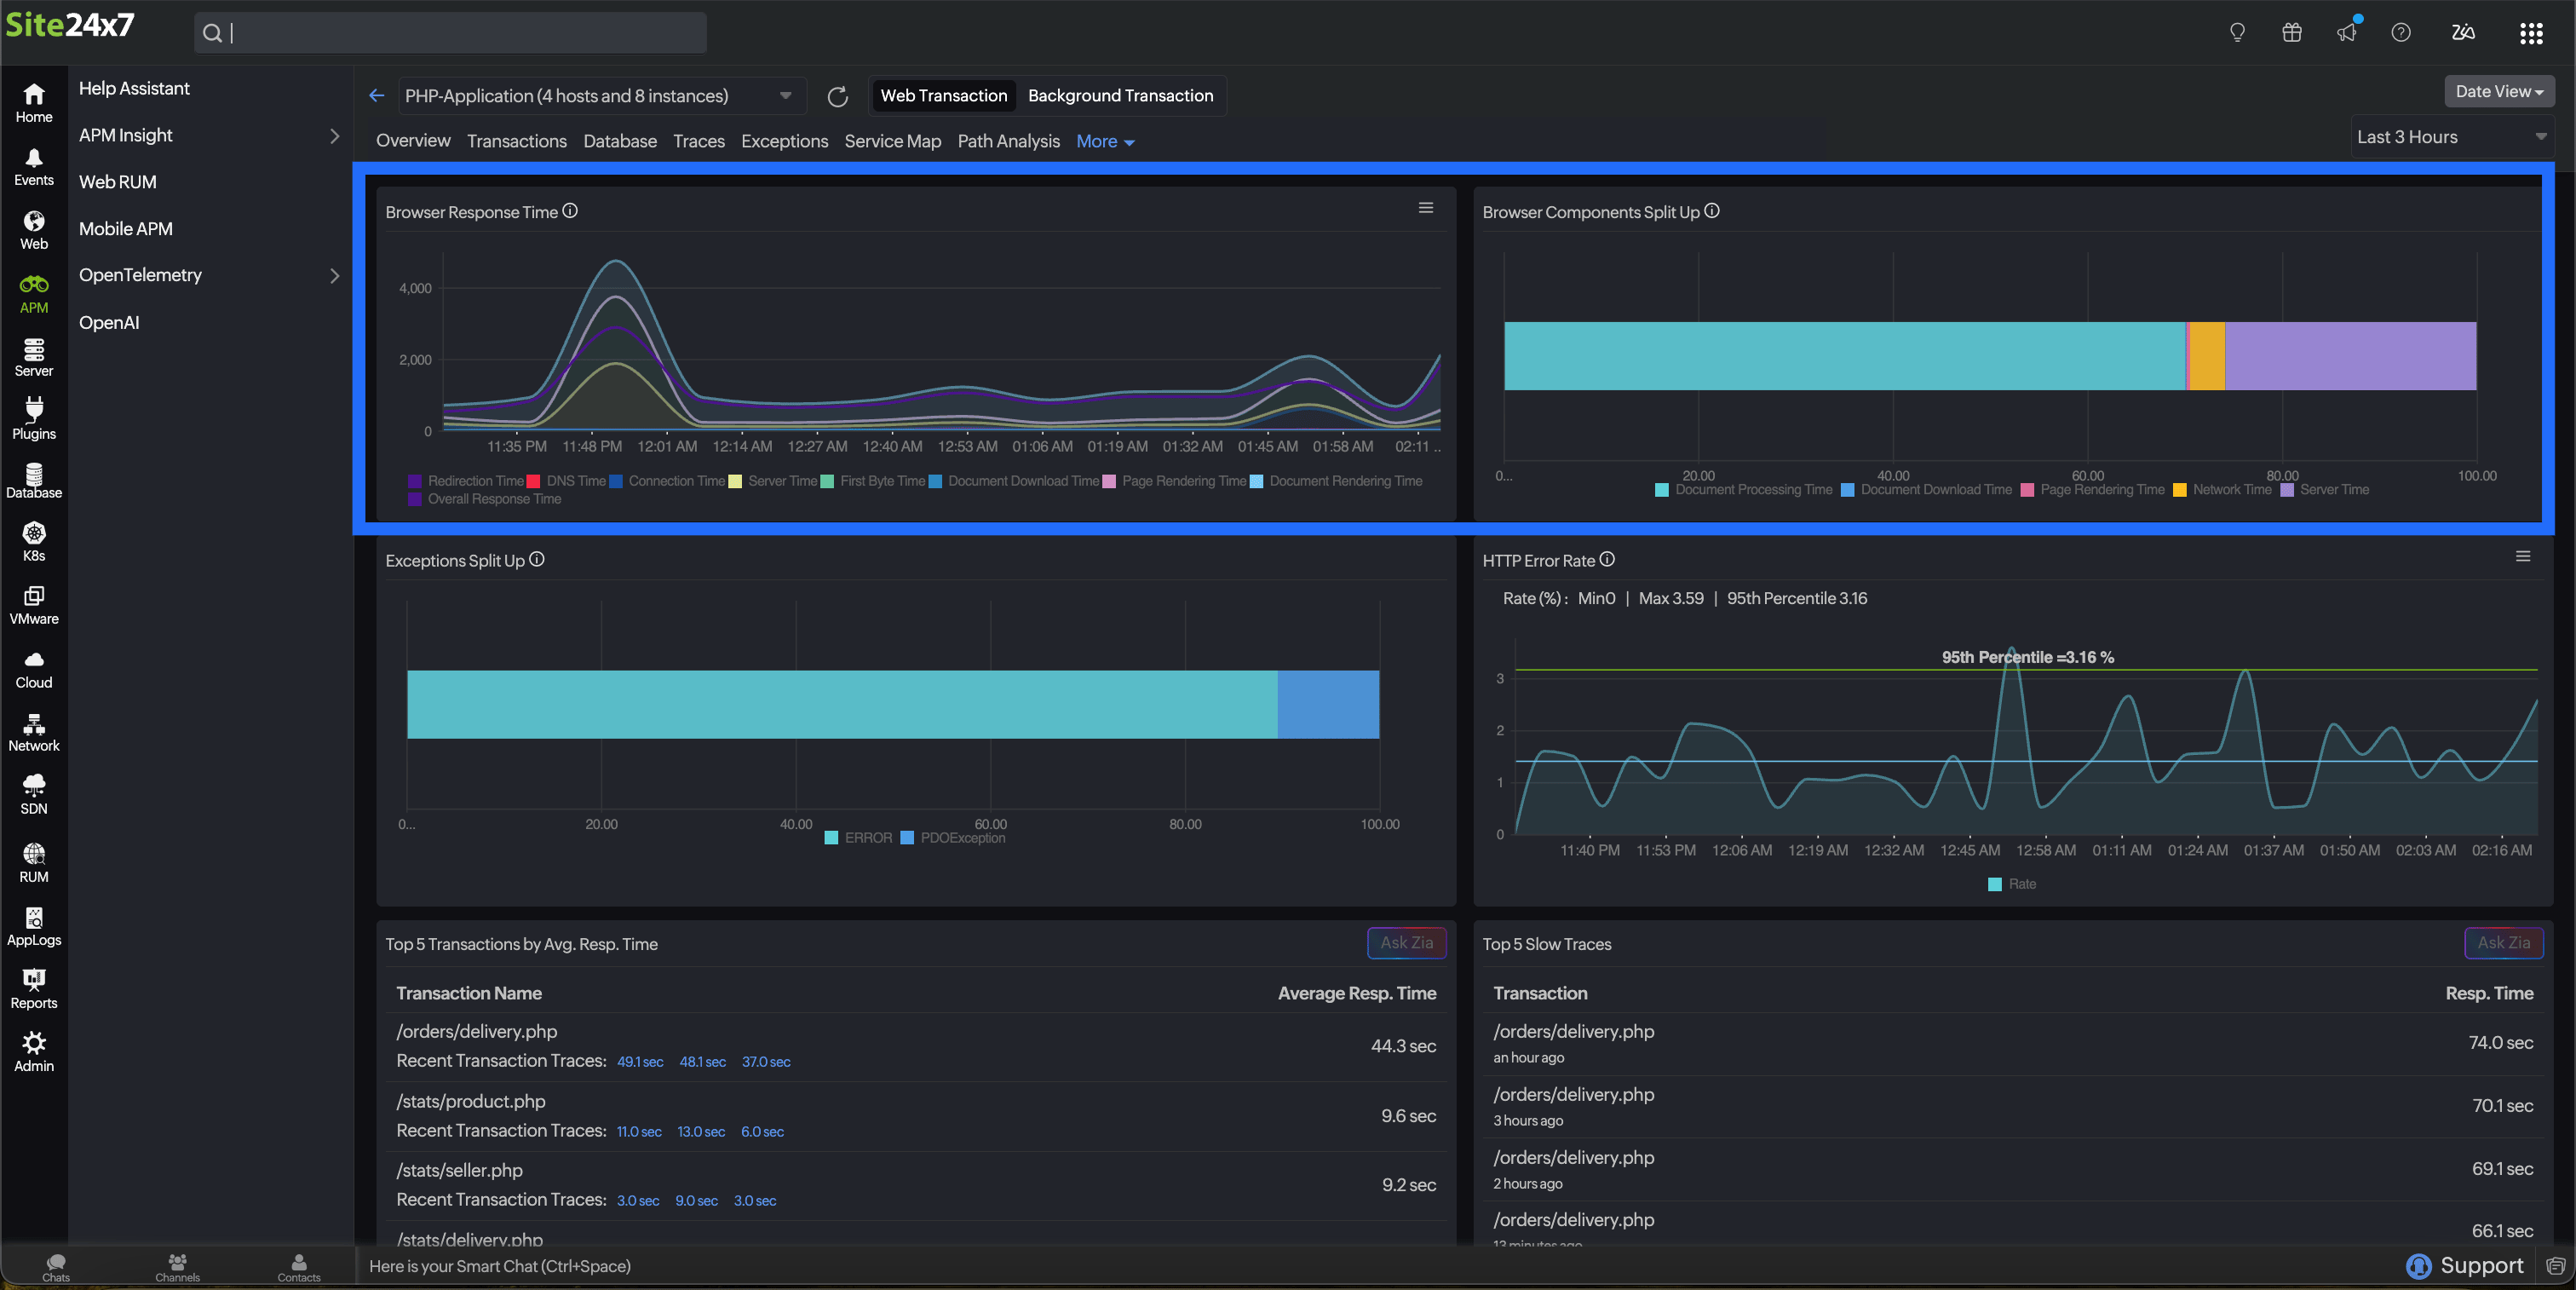 Figure 4. RUM-related widgets under the Overview tab.
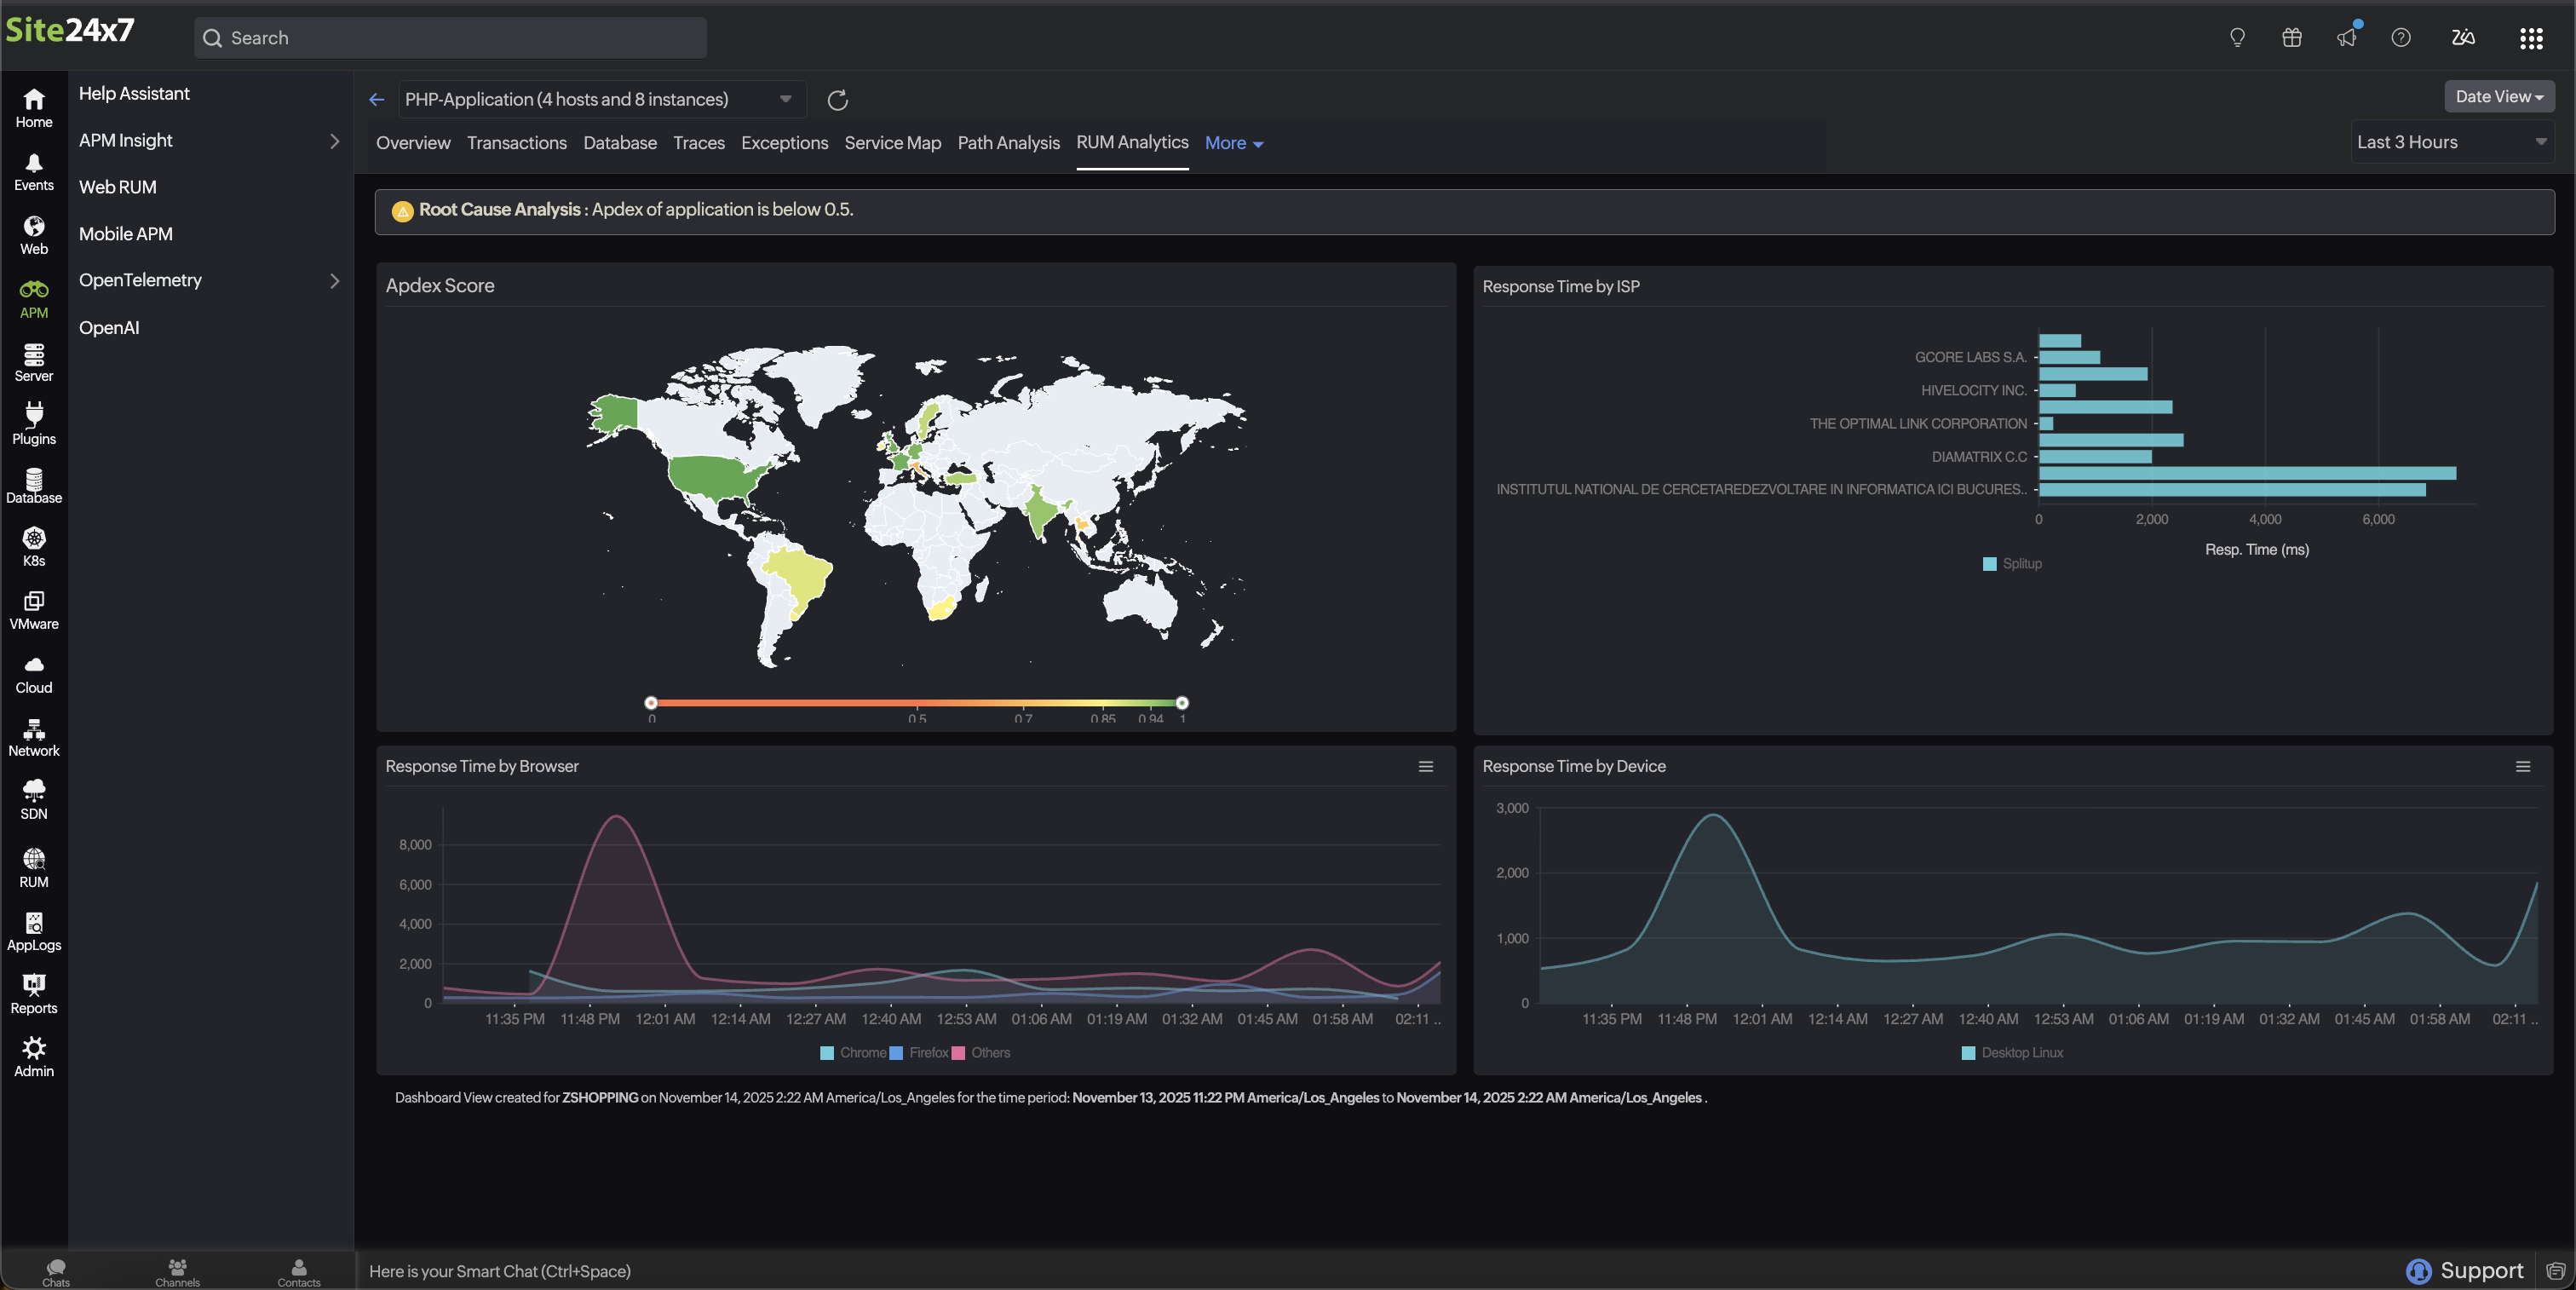 Figure 5. RUM widgets under the RUM Analytics tab.
Related articles