Forwarding logs from GCP storage bucket
The Google Cloud Platform (GCP) Cloud Storage acts as a scalable container that stores a large volume of data. Site24x7 uses the Google Cloud Function to gather new logs added in the Cloud Storage bucket and sends them to Site24x7 for indexing.

Define the Log Type
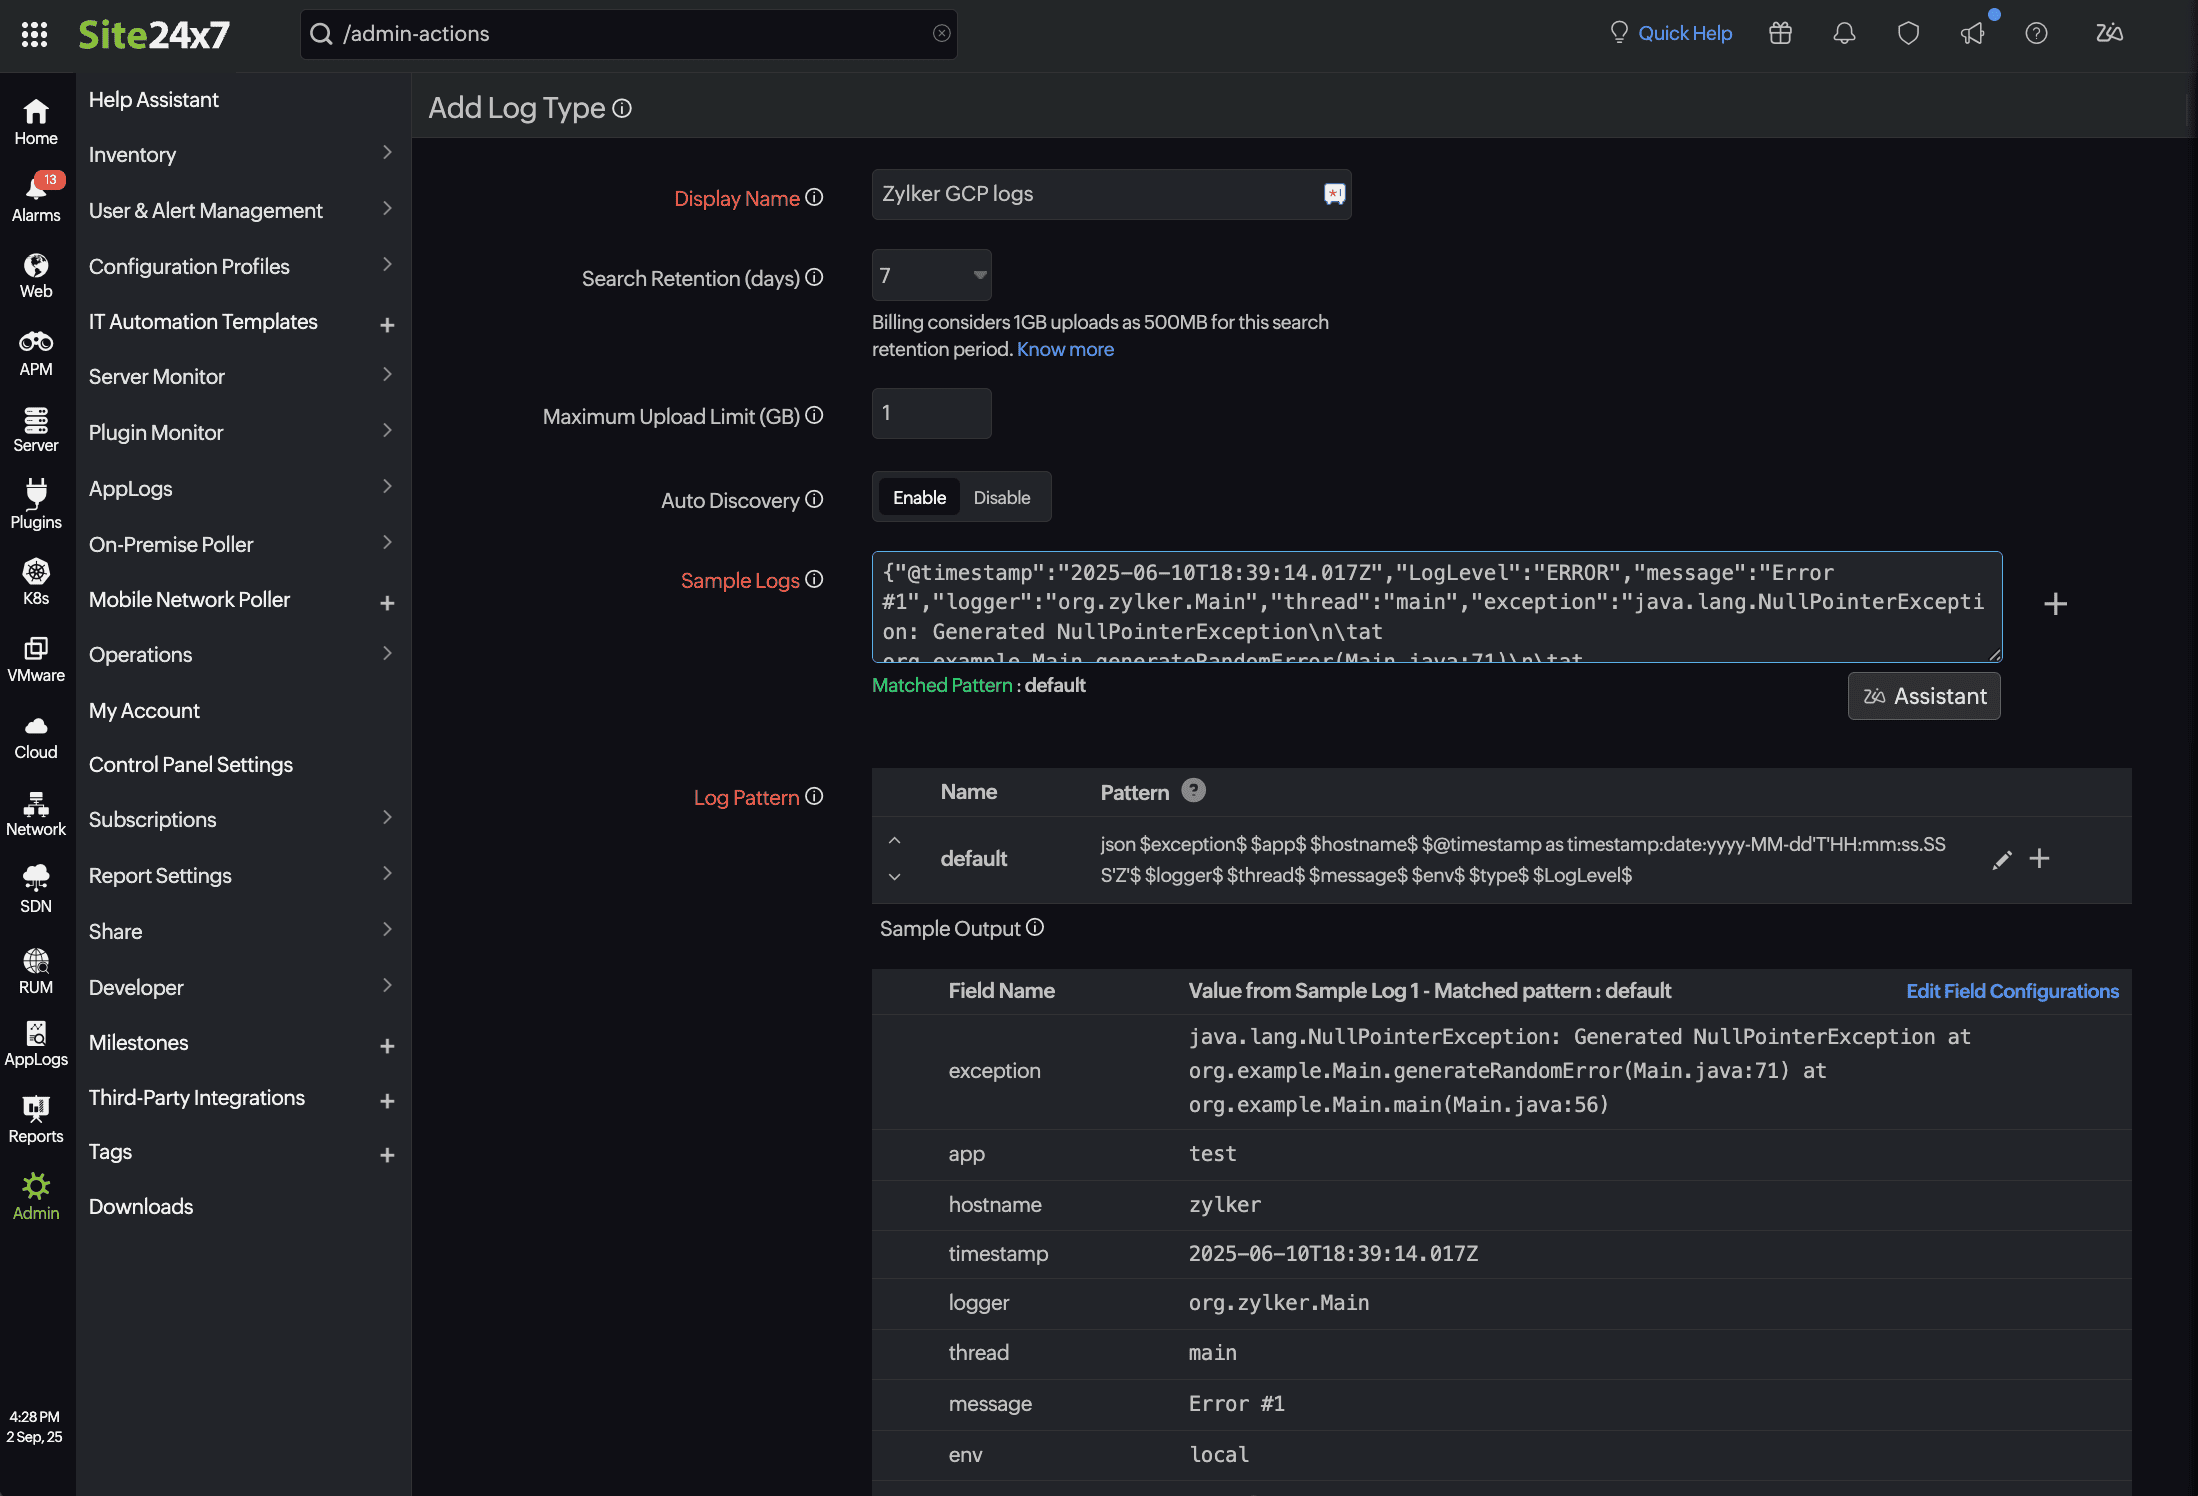
A Log type defines the specific format in which an application generates its logs. Since applications like IIS, Cassandra, Apache, or MySQL produce logs in varying formats, creating distinct log types helps organize them, making log access easier and searches more efficient. To create a log type, follow the below steps:
- Log into Site24x7.
- Navigate to Admin > AppLogs > Log Types > Add Log Type. You can also define a custom log type to group logs from various applications for easier access and more efficient searching.
- If you choose Custom Log Type, enter a display name.
- Provide the logs stored in your Cloud Storage bucket to identify the log pattern.
- Click Save.
Once you define a Log Type for your logs stored in your GCP, list it under a Log Profile and start managing your logs by performing search queries.
Create a Log Profile
To collect logs from GCP Cloud Storage bucket into Site24x7, begin by setting up a Log Profile and configuring a Google Cloud function to route logs from your Cloud Storage bucket to Site24x7's log receiver. Follow the below steps to create a log profile:
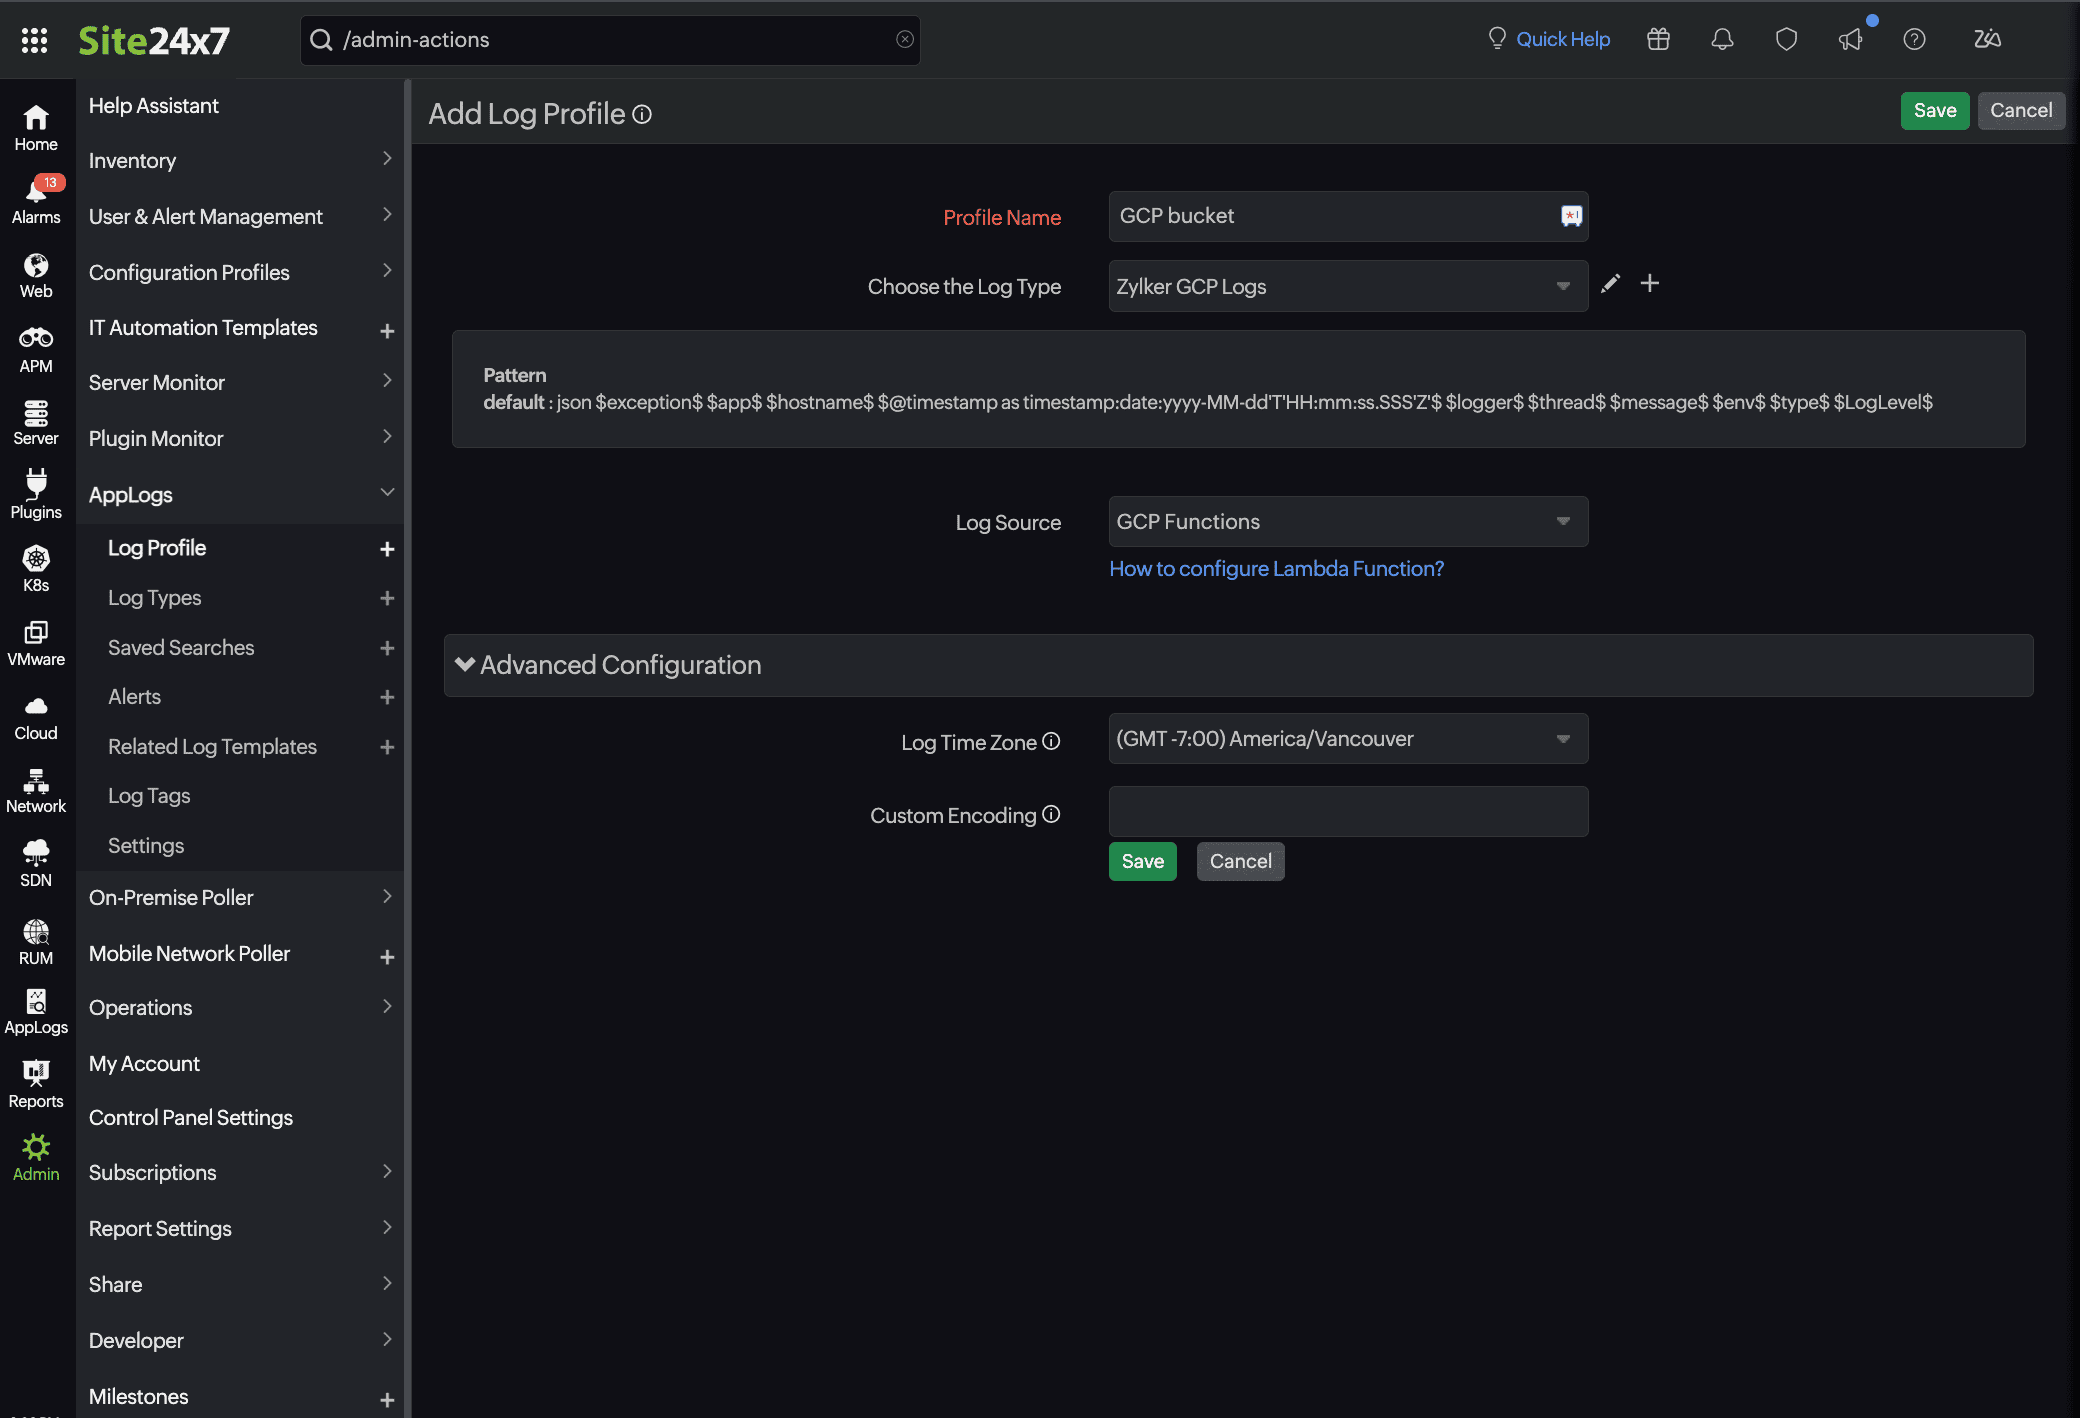
- Navigate to Admin > AppLogs > Log Profile > Add Log Profile.
- Enter the following details:
- Profile Name: Enter a unique name to identify your Log Profile.
- Log Type: Choose the log type, the one that was created using the above steps.
- Log Source: Choose GCP Functions (used here as a placeholder to set up a generic log source).
- Timezone: Select the appropriate timezone for your logs.
- Click Save to create the log profile.
Configure Google Cloud functions
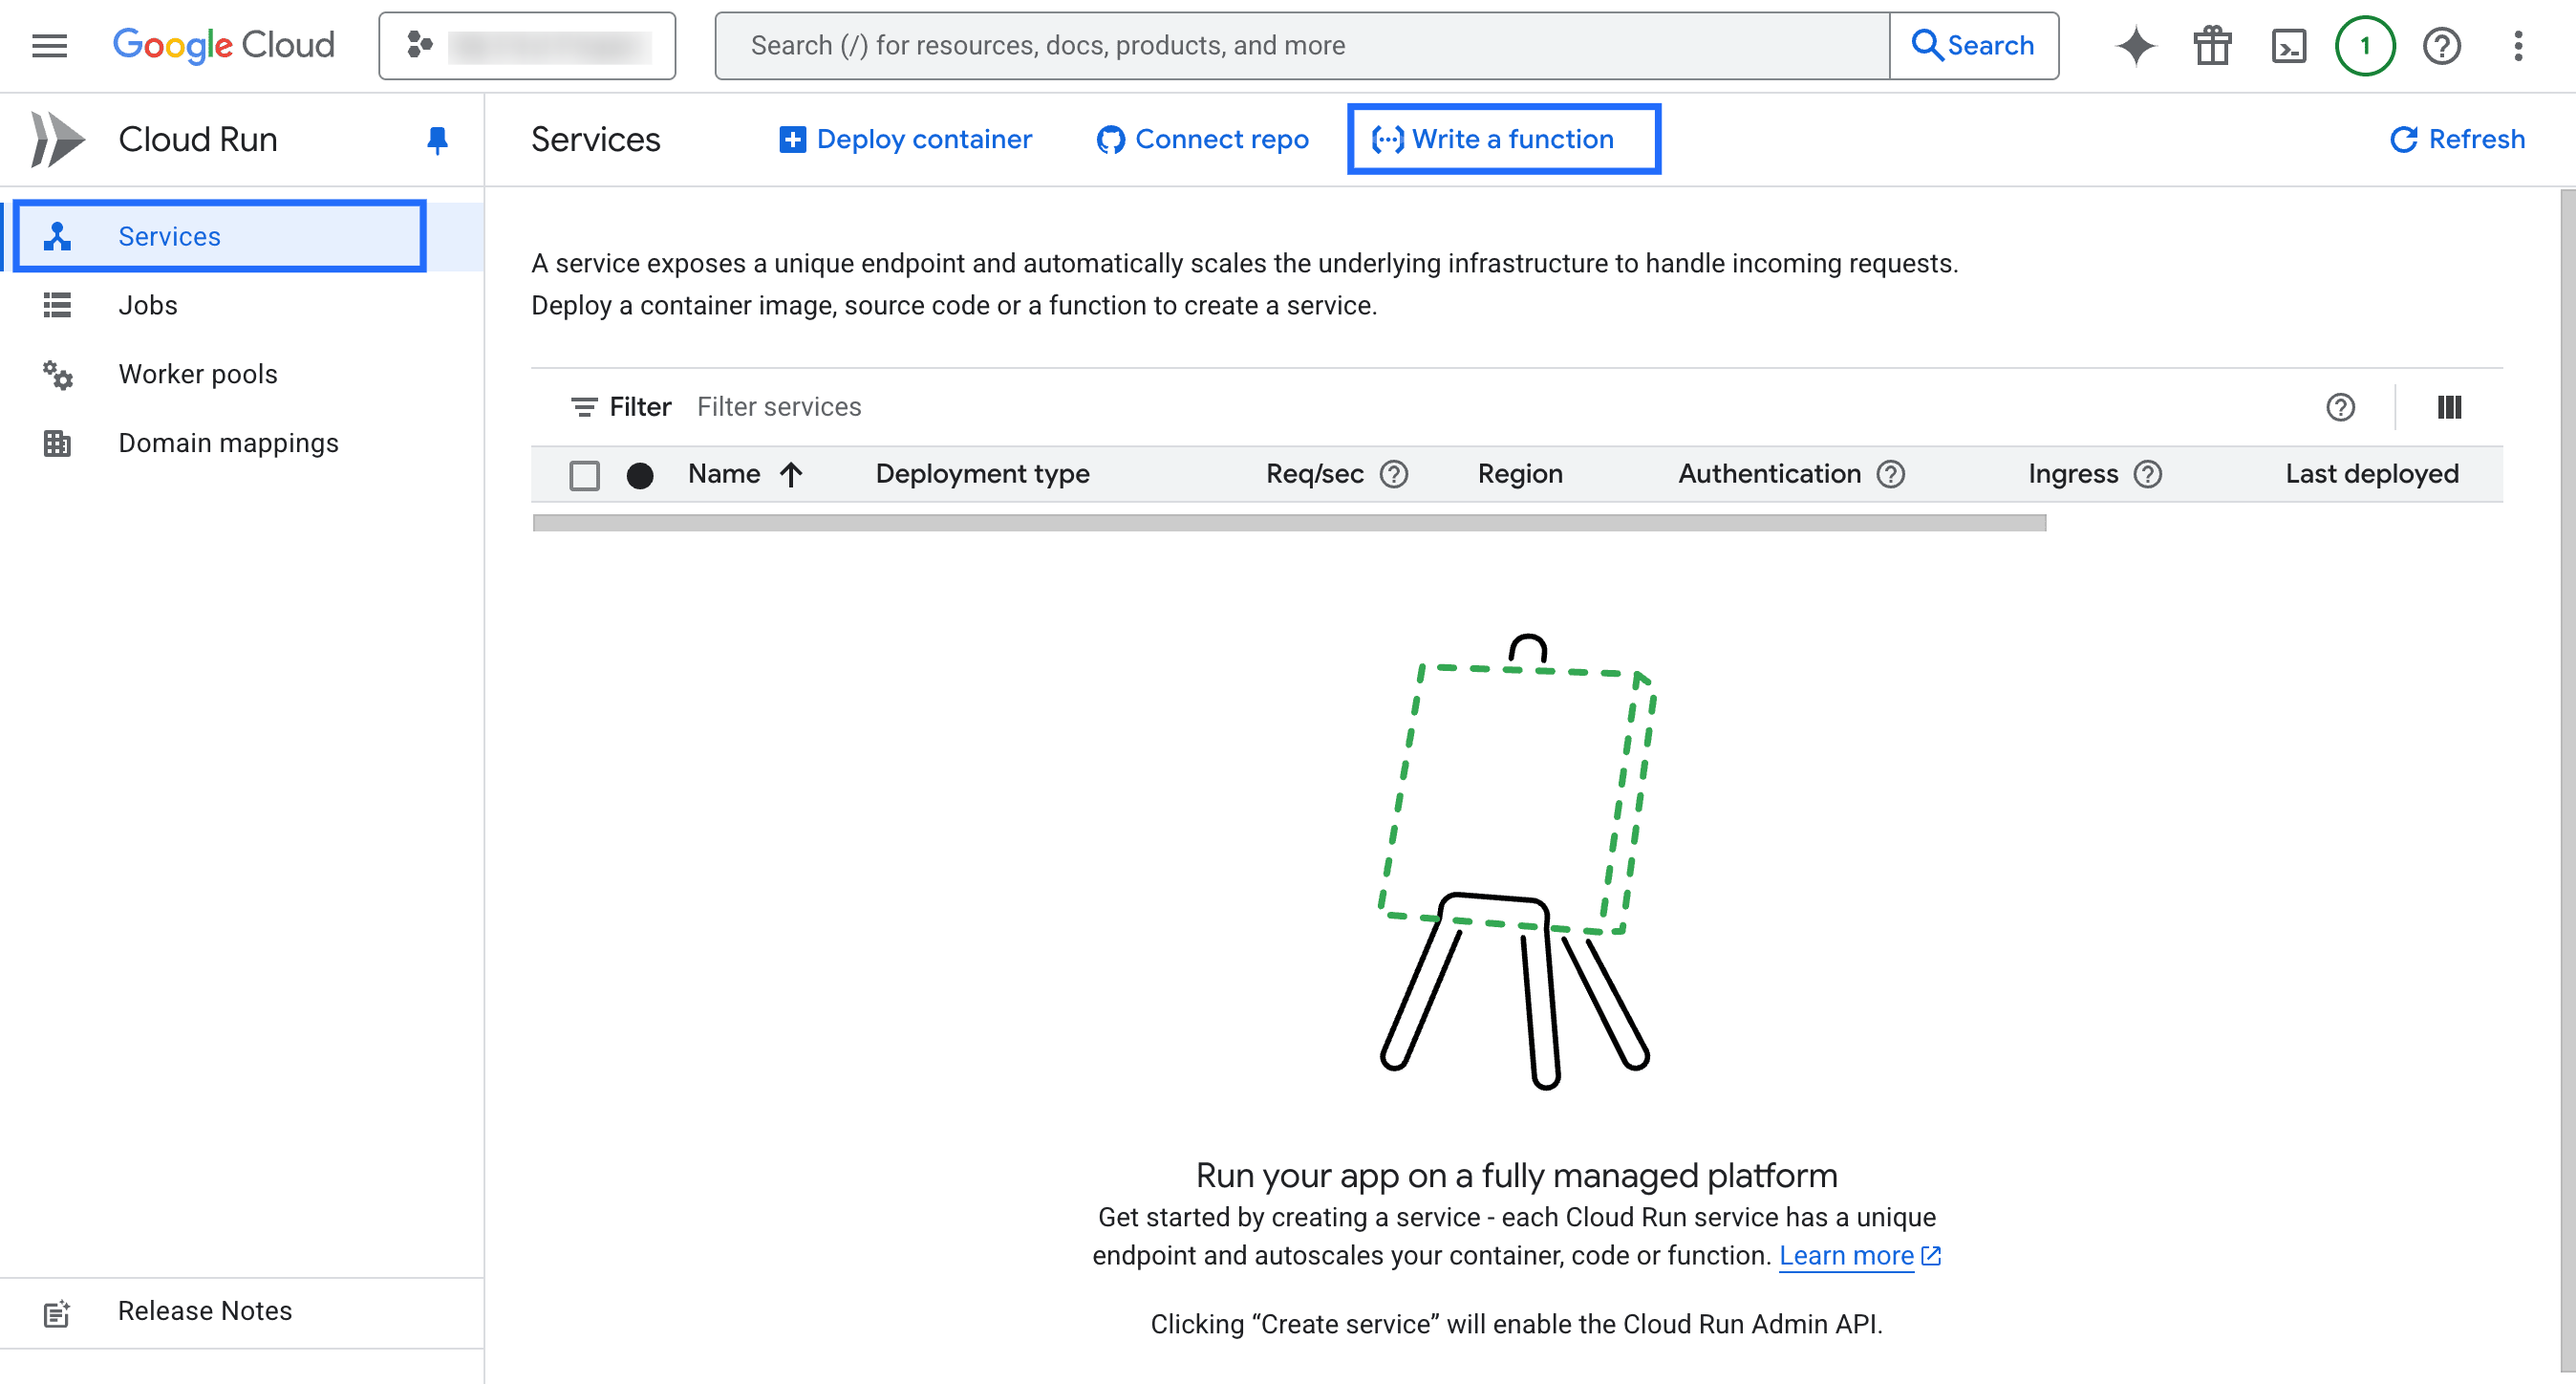
- Sign in to the Google Cloud Console.
- Go to the hamburger icon on the top-left corner.
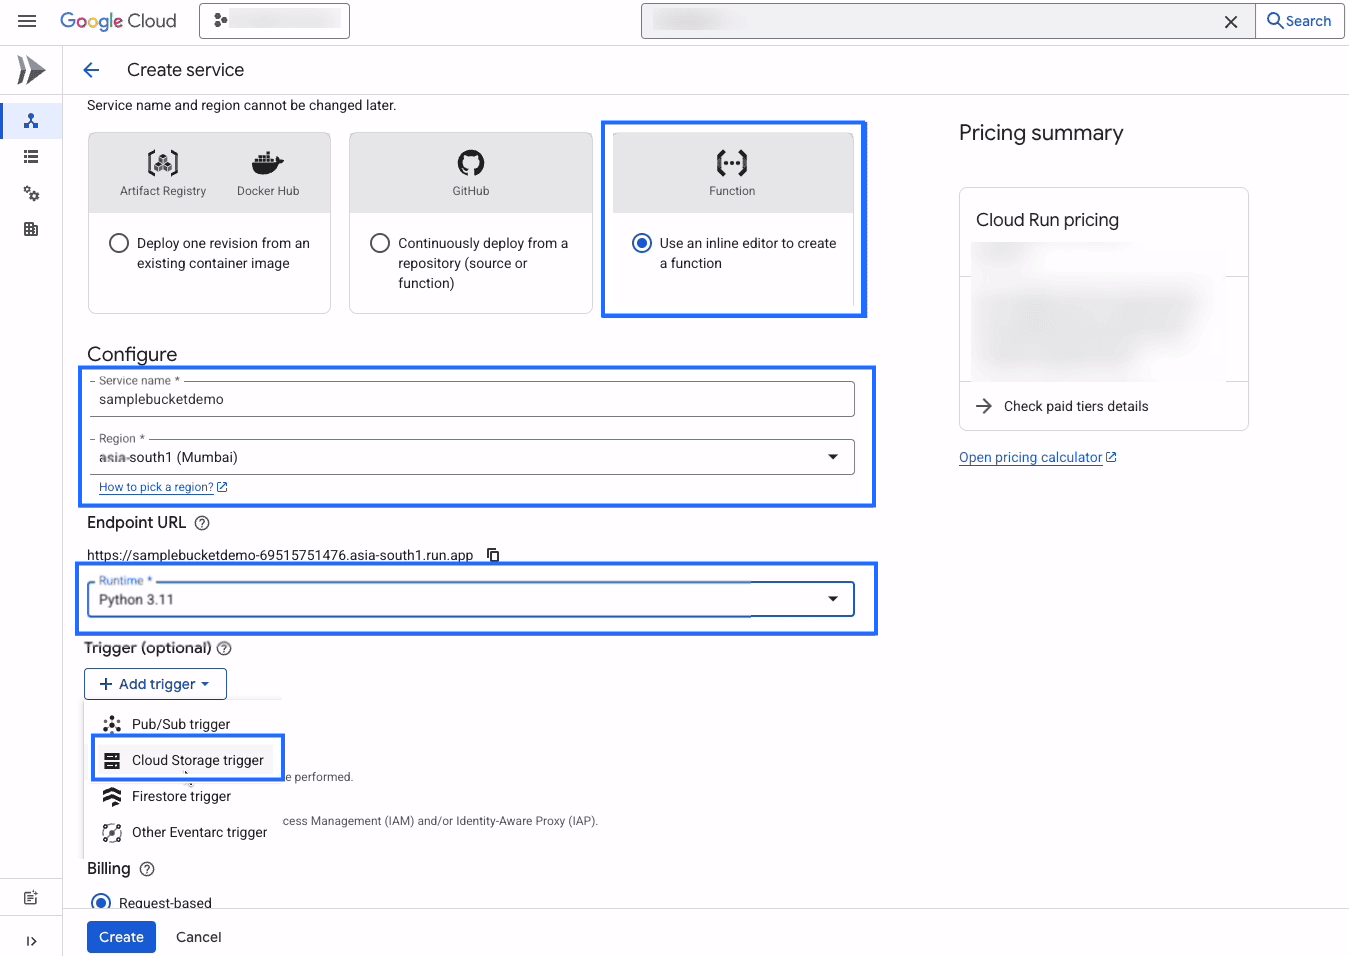
- Click on Cloud Run > Services > Write a function.
- On the Create service page that opens, set up the Cloud function:
- Choose Use an Inline editor to create a function.
- Provide your service name and select your Region.
- Choose Python 3.11 (the latest available) as the Runtime.
- Under Trigger, select Cloud Storage trigger that opens the Eventarc Trigger window.
- Choose the your object name created in the bucket in the Event type.
- Choose application/json in the Event data content type.
- Browse your bucket name and click Select to add it under the Bucket field to make the Google Cloud Storage bucket to subscribe to your newly created bucket.
- Choose the Compute Engine default service account as the Service account.
- Click Save trigger.
The trigger details are added successfully.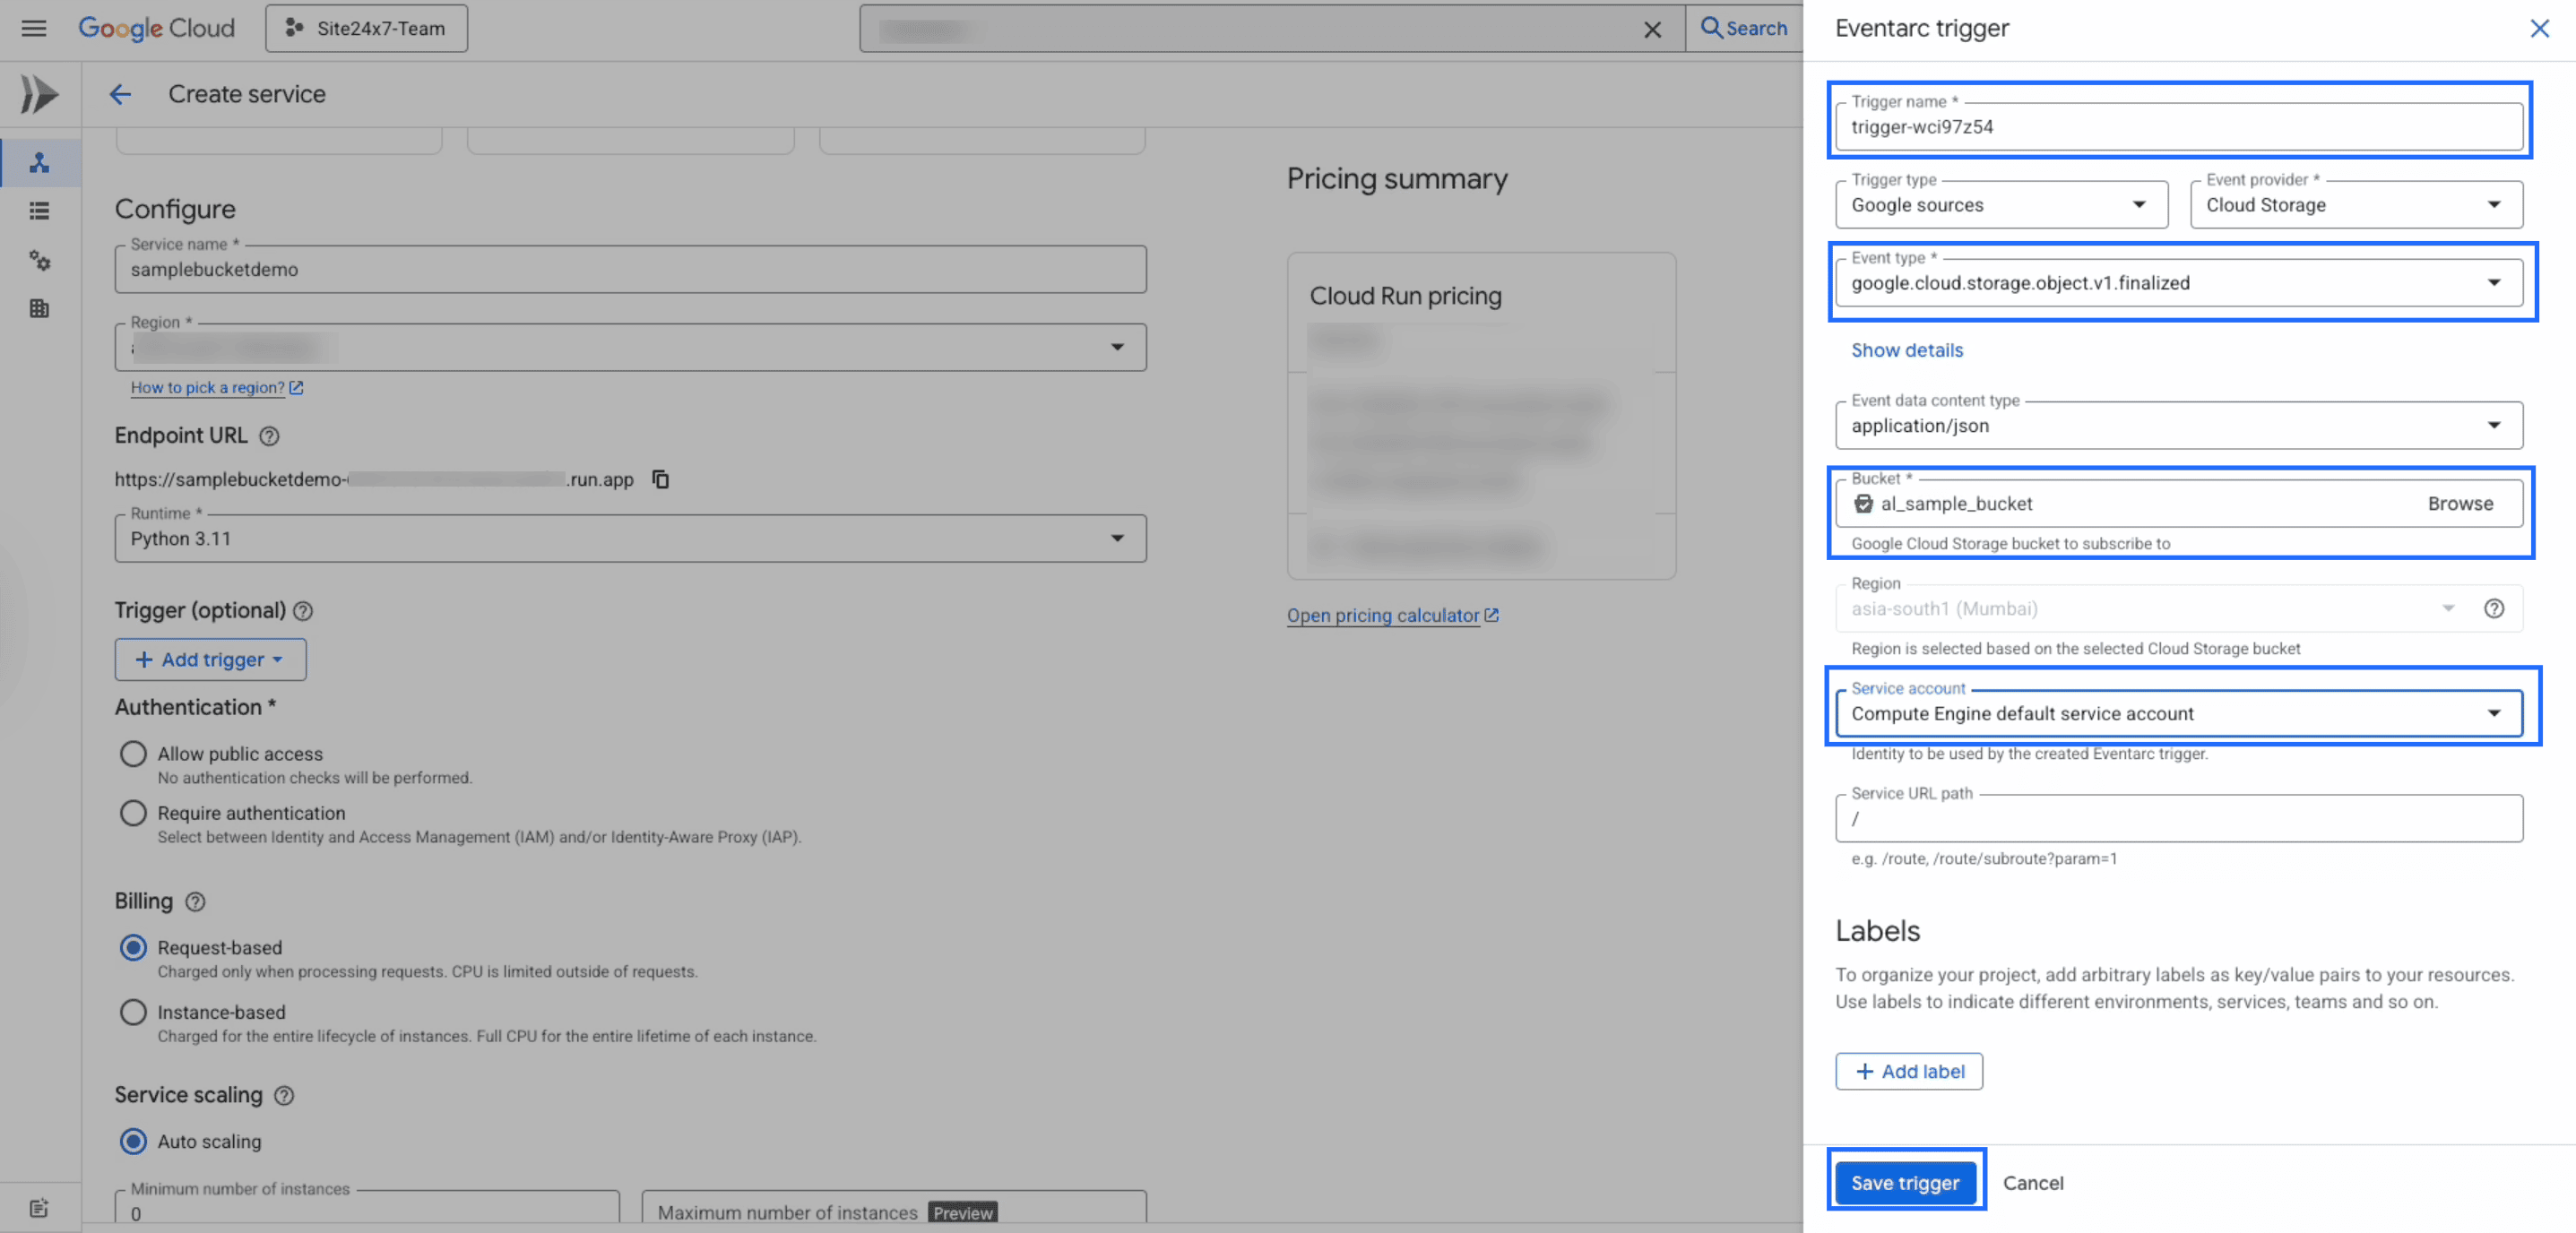
- Under the Authentication section:
- Choose Required authentication and enable the Identify and Access Management (IAM) checkbox.
- Click Create.
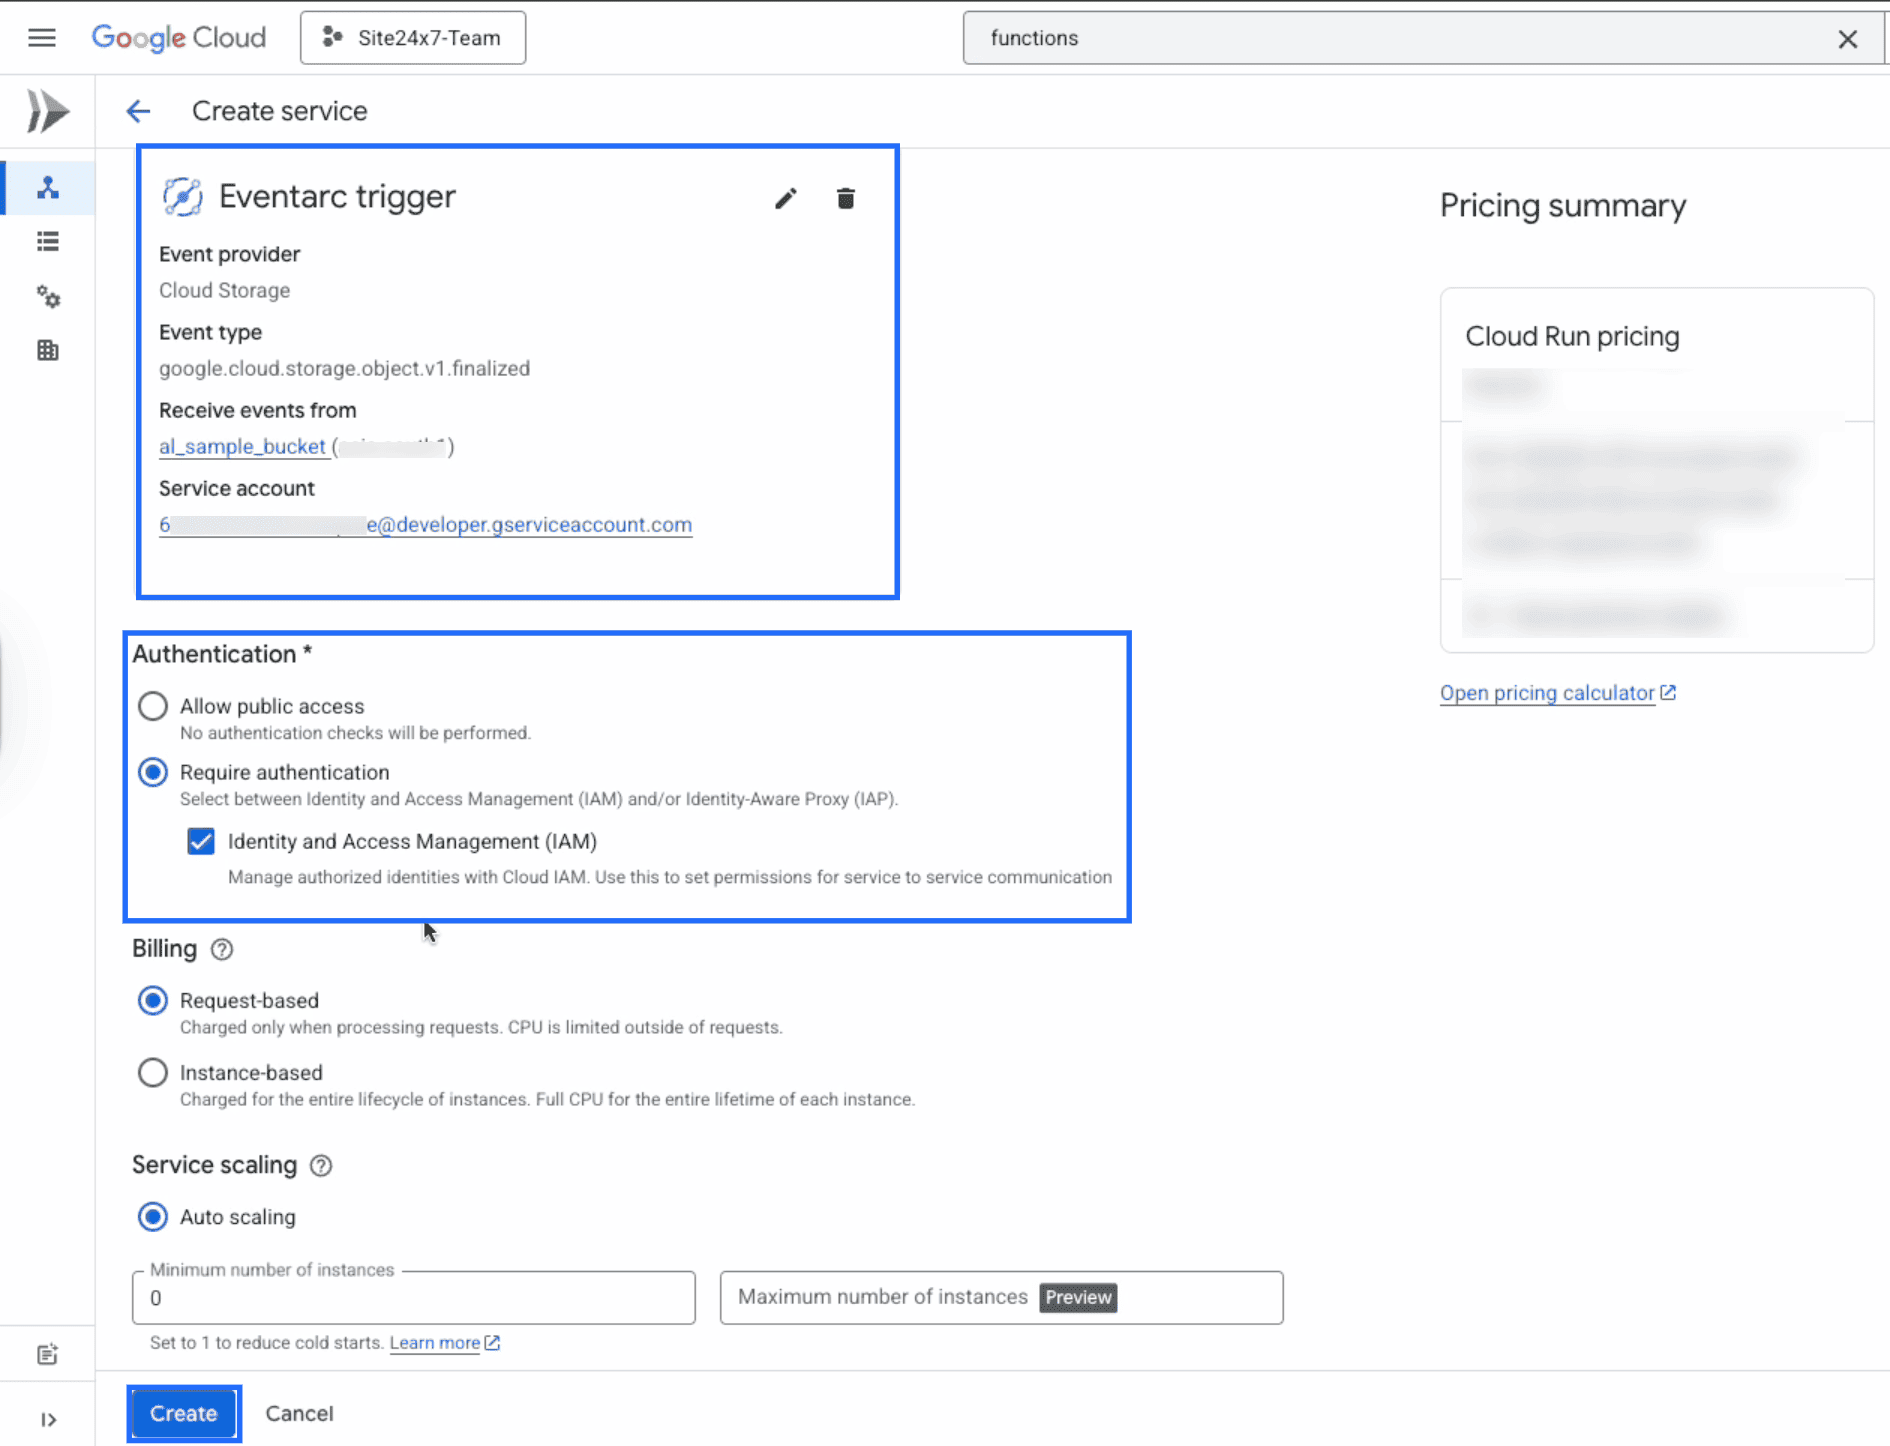
This setup will create a Eventarc trigger function that listens to incoming log messages from Cloud Storage trigger.
Deploy the function code
- Once the Eventarc trigger is created, edit the cloud function (function code) in the main.py file.
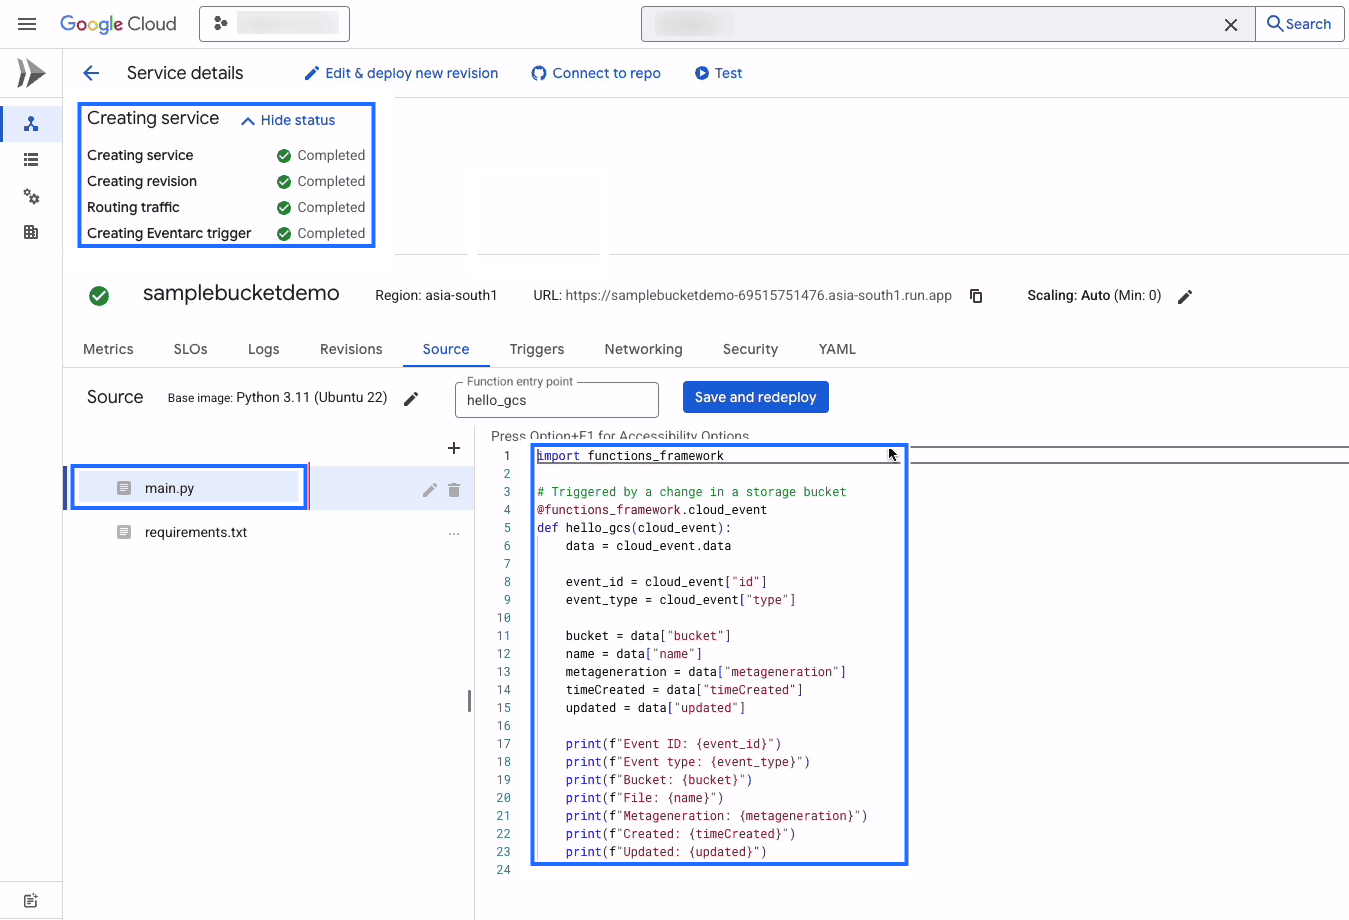
- Replace the main.py file with the code from the below link:
https://github.com/site24x7/applogs-gcp-functions/blob/main/cloudbucket/main.py
After replacing the code, change the Function entry point value to "process_gcs_event".
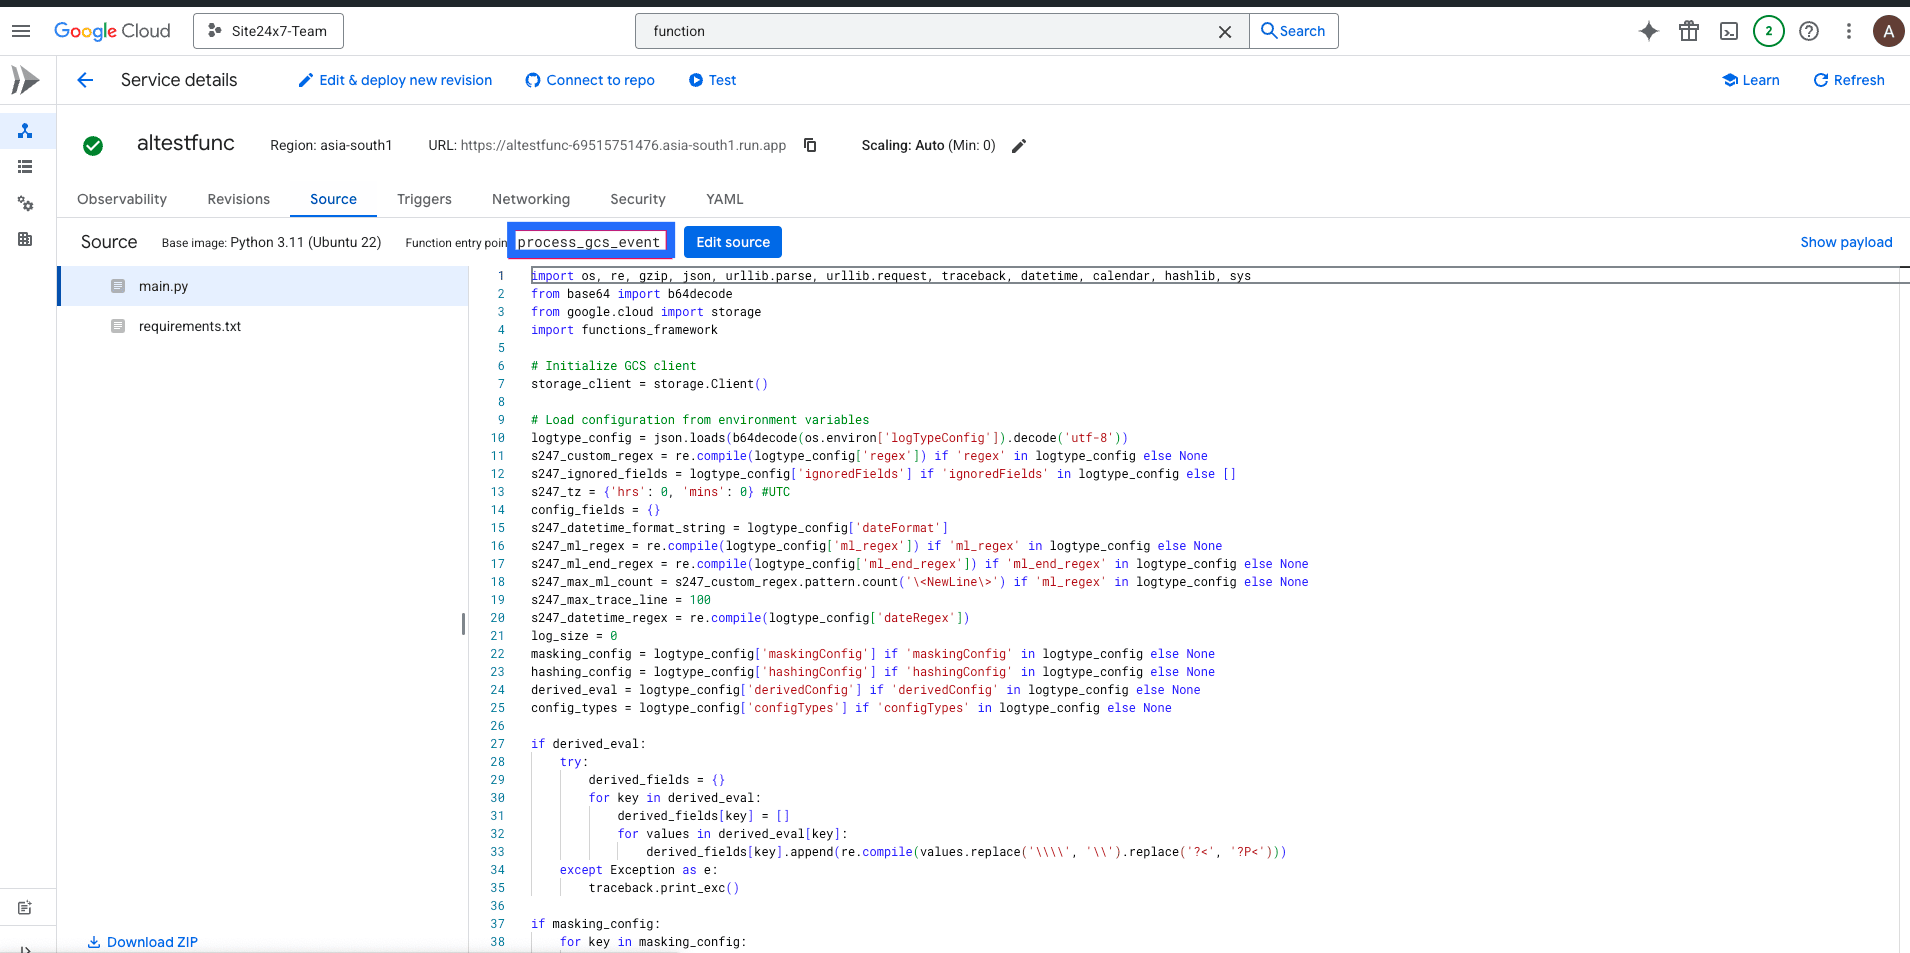
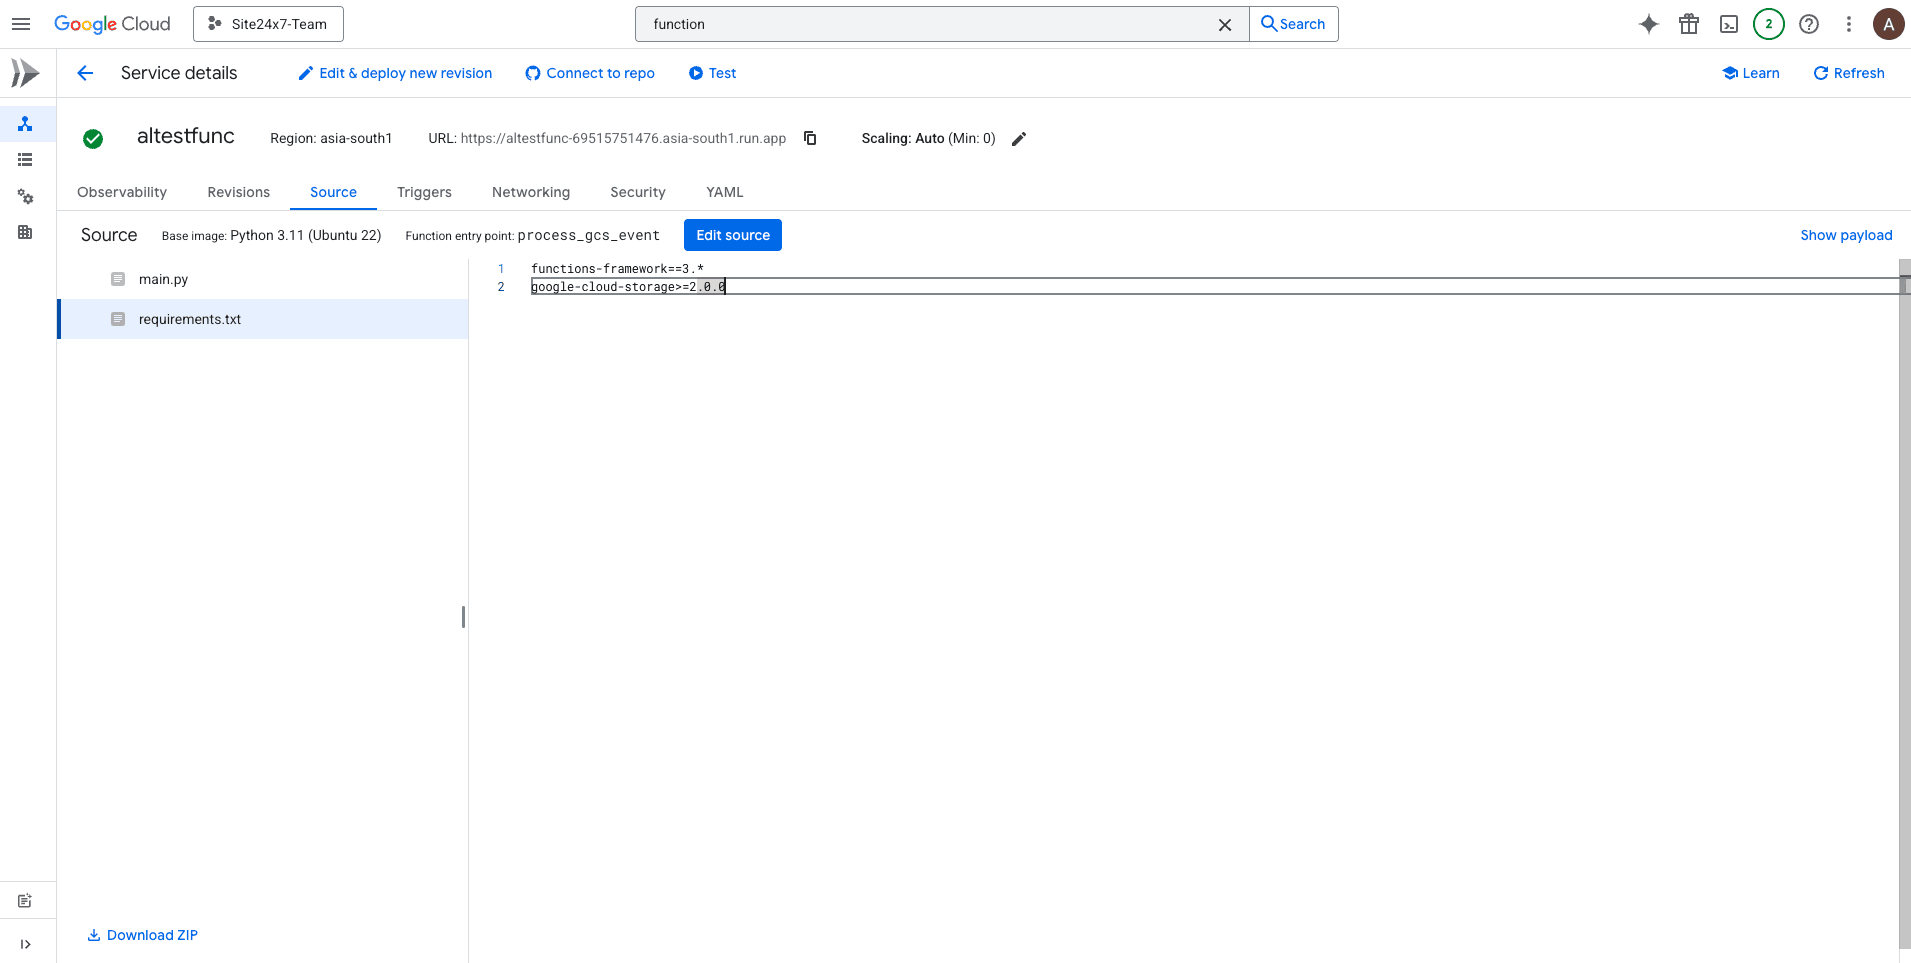
- Replace requirements.txt file contents with the below content:
https://github.com/site24x7/applogs-gcp-functions/blob/main/cloudbucket/requirements.txt
- After entering the code, go to the Site24x7 web client.
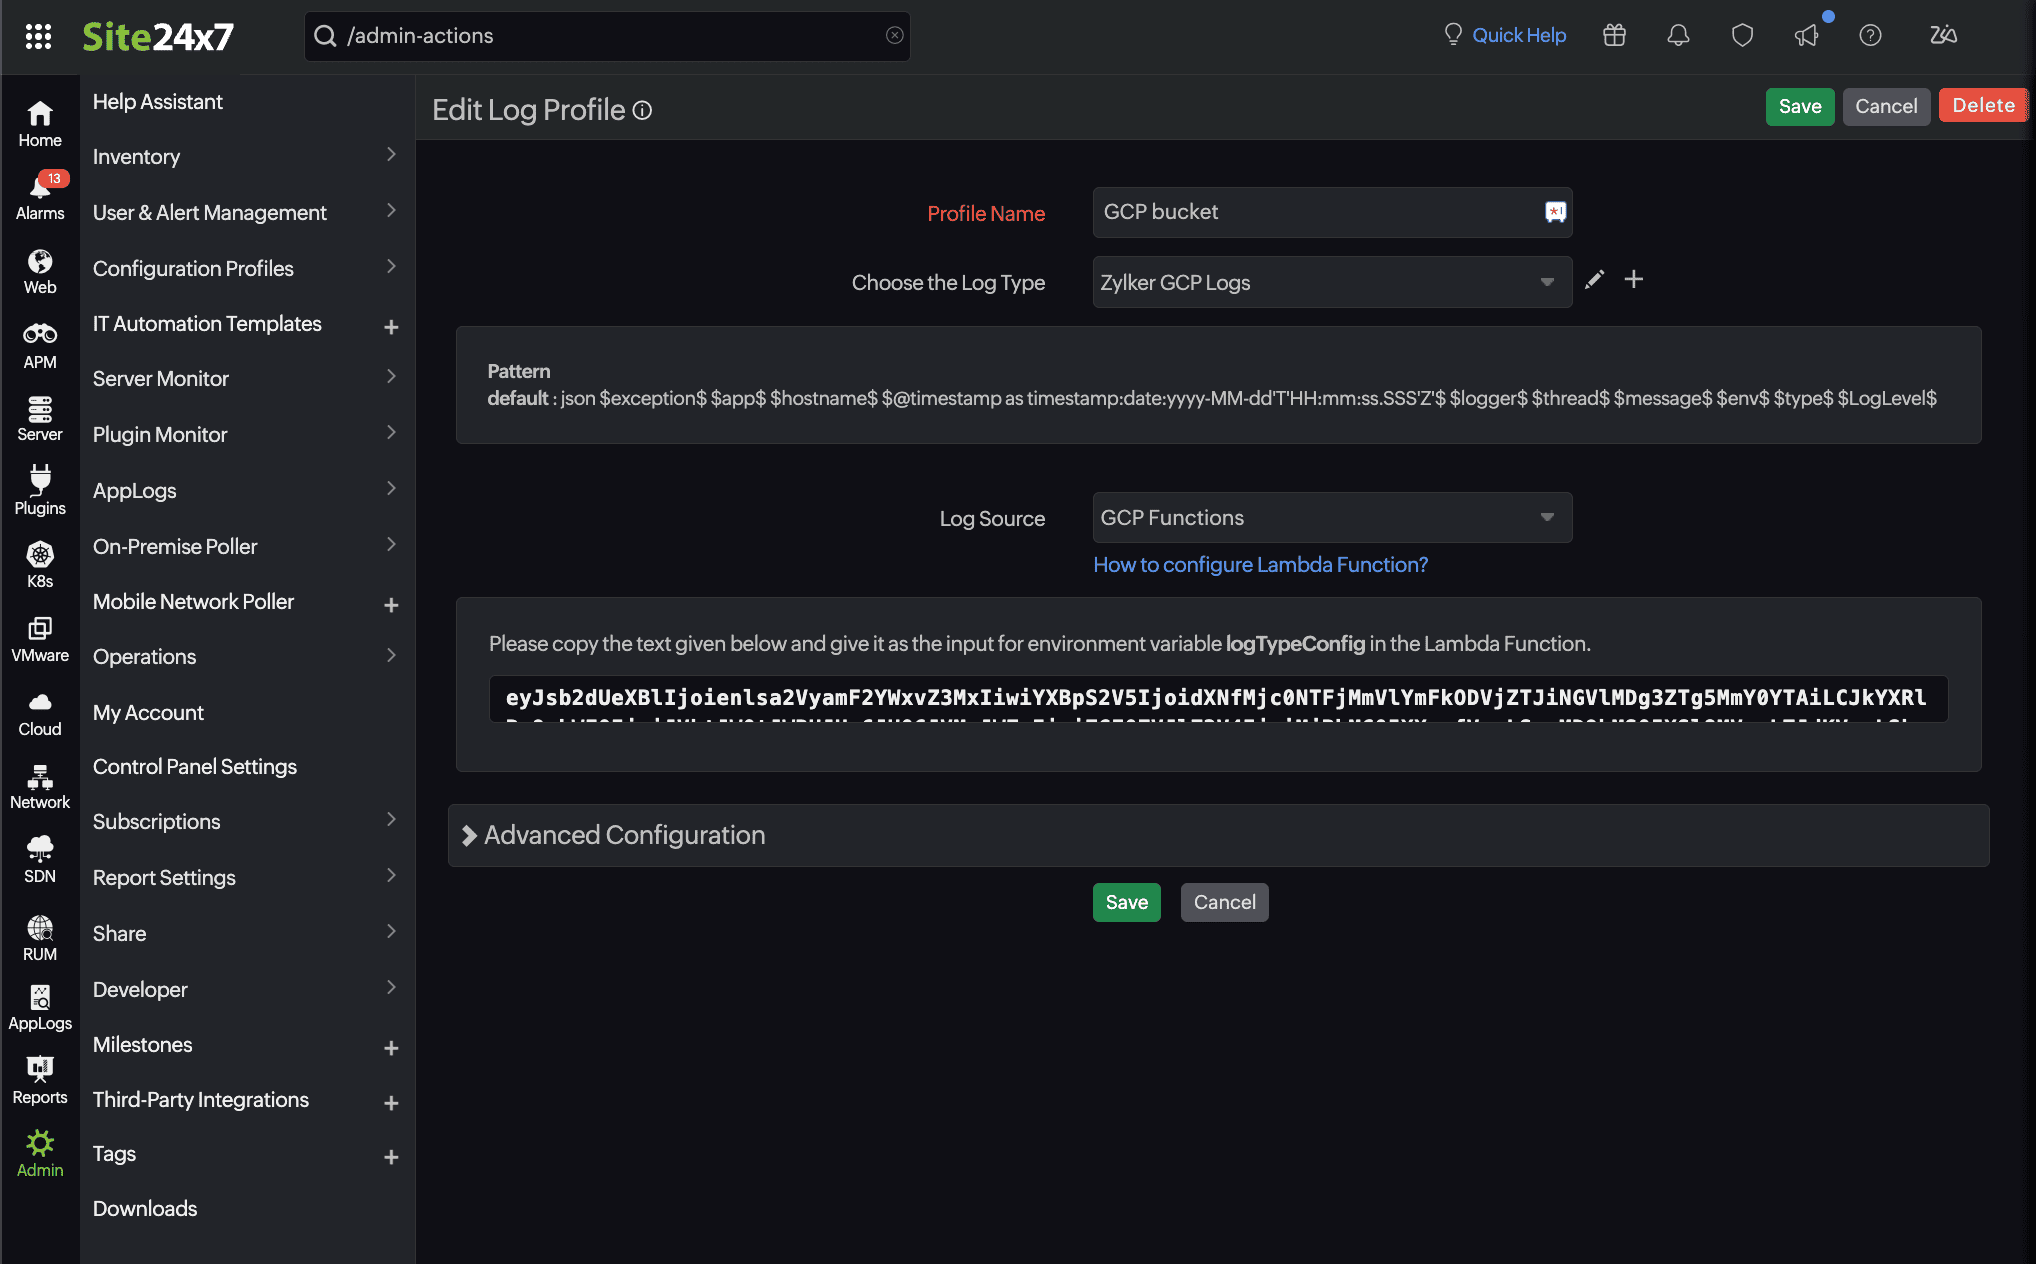
- Navigate to Admin > Applogs > Log Profile
- Select the created Log Profile, and copy the displayed code for the logTypeConfig.
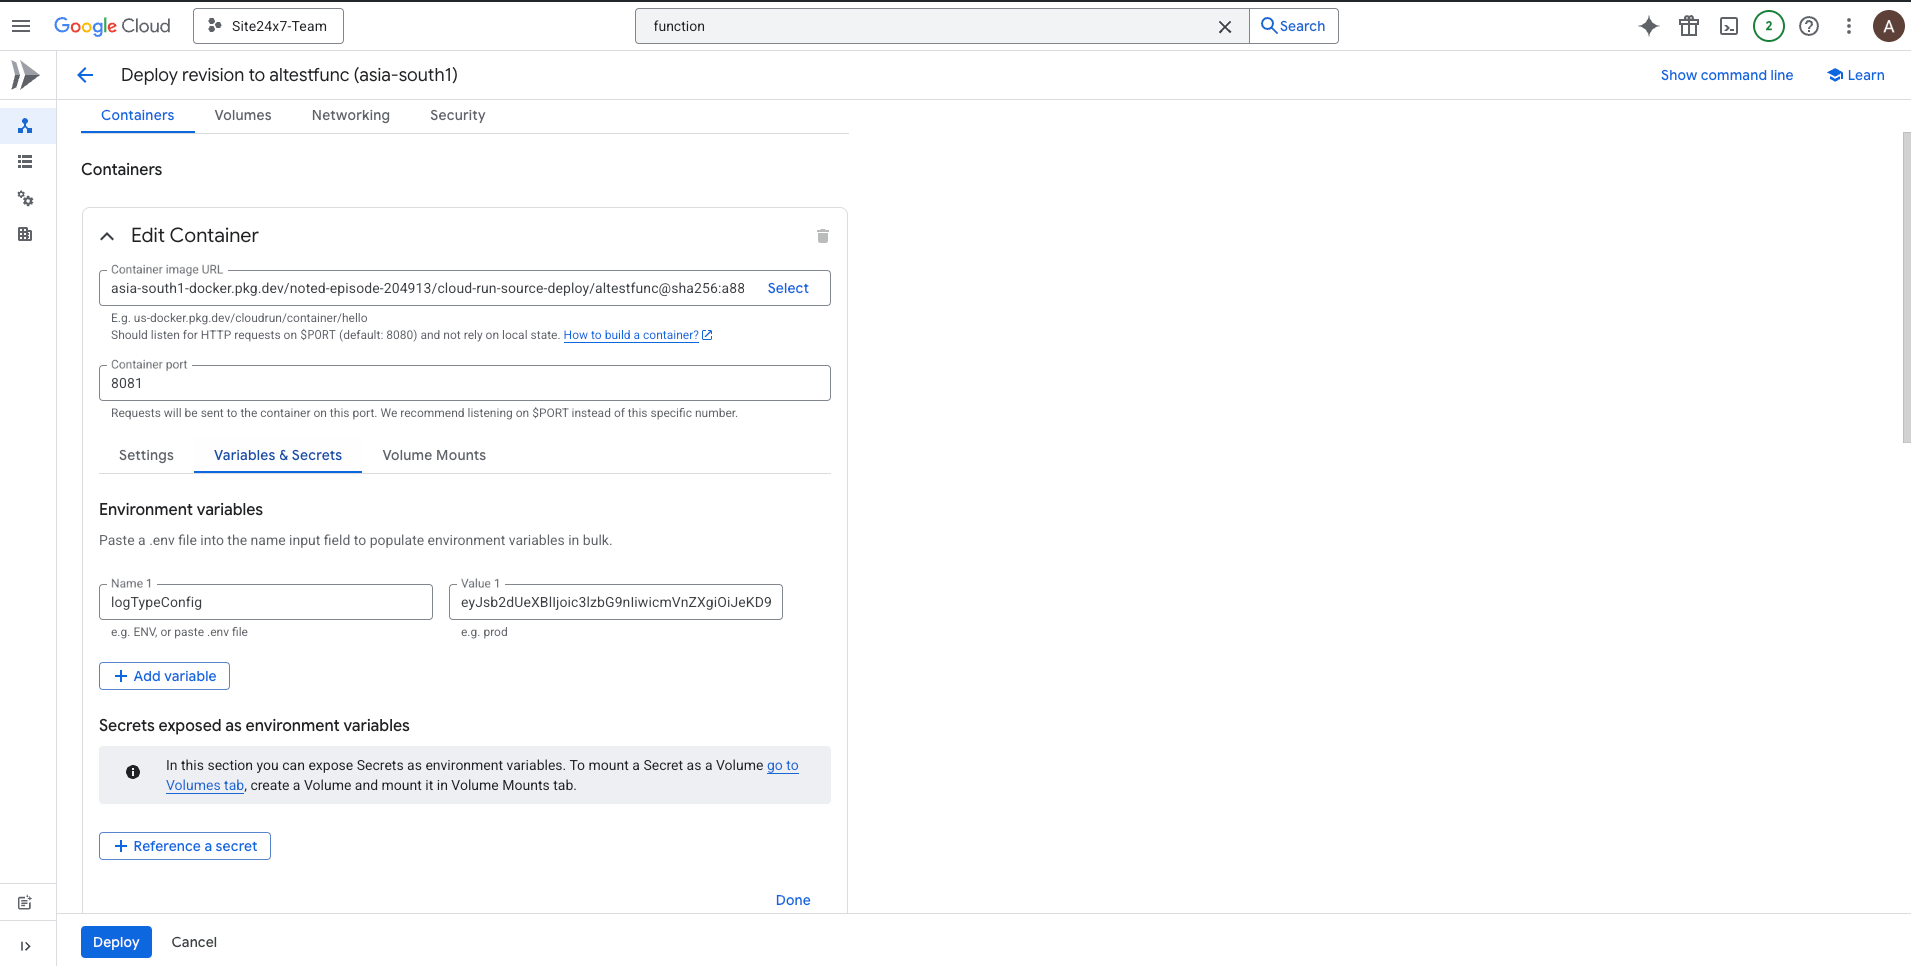
- Back in the Google Console:
- Navigate to the Configuration section of the created Cloud Function.
- Under Environment variables, add a new key-value pair:
- Key: logTypeConfig
- Value: Paste the logTypeConfig copied from the Site24x7 Log Profile page.
- Click Deploy.
