Install the .NET agent in Azure App Services (Linux)
Monitor your .NET applications hosted on Azure App Service running on Linux by integrating the Site24x7 APM Insight .NET agent.
You can install the agent using either of the following methods:
Using a custom deployment script
Install the .NET agent using a custom startup script that automates setup and configuration during application startup.
Step 1: Create a deployment script
- Navigate to the directory /home
- Create a new shell script named apm-dotnetagent-deploy.sh in this location.
- Add the following content to the script:
#!/bin/bash
set -e

LICENSE_KEY="YOUR_LICENSE_KEY"
SITE24X7_APP_NAME="YOUR_APPLICATION_NAME"
AGENT_HOME="/home/apminsight/dotnet"
AGENT_DIR="$AGENT_HOME/ApmInsightDotNetCoreAgent"

echo "Setting environment variables..."

export SITE24X7_APP_NAME="$SITE24X7_APP_NAME"
export S247_LICENSE_KEY="$LICENSE_KEY"
export CORECLR_ENABLE_PROFILING=1
export CORECLR_PROFILER="{9D363A5F-ED5F-4AAC-B456-75AFFA6AA0C8}"
export CORECLR_SITE24X7_HOME="$AGENT_DIR"
export CORECLR_PROFILER_PATH_64="$AGENT_DIR/x64/libClrProfilerAgent.so"
export CORECLR_PROFILER_PATH_32="$AGENT_DIR/x86/libClrProfilerAgent.so"
export DOTNET_STARTUP_HOOKS="$AGENT_DIR/netstandard2.0/DotNetAgent.Loader.dll"
export MANAGEENGINE_COMMUNICATION_MODE="ExporterService"

if [ -d "$AGENT_DIR" ]; then
    echo "APM Insight agent directory already exists. Skipping installation..."
else
    echo "Agent directory not found. Proceeding with installation..."

    echo "Updating packages and installing unzip..."
    apt-get update
    apt-get install -y unzip vim-common

    wget https://staticdownloads.site24x7.com/apminsight/agents/dotnet/apminsight-dotnetcoreagent-linux.sh
    chmod +x apminsight-dotnetcoreagent-linux.sh

    # Patch xxd usage
    sed -i 's/xxd -p/od -An -tx1 | tr -d " \\n"/g' apminsight-dotnetcoreagent-linux.sh

    echo "Installing .NET Core Agent..."
    printf "A\n" | ./apminsight-dotnetcoreagent-linux.sh \
        -Destination "$AGENT_HOME" \
        -LicenseKey "$LICENSE_KEY"

    rm -f apminsight-dotnetcoreagent-linux.sh

    wget -O InstallDataExporter.sh \
    https://staticdownloads.site24x7.com/apminsight/S247DataExporter/linux/InstallDataExporter.sh

    chmod +x InstallDataExporter.sh
    sh InstallDataExporter.sh
    rm -f InstallDataExporter.sh
fi

# YOUR APPLICATION STARTUP COMMAND GOES HERE
- Replace YOUR_LICENSE_KEY with your Site24x7 license key.
- Replace YOUR_APPLICATION_NAME with your application name in Site24x7.
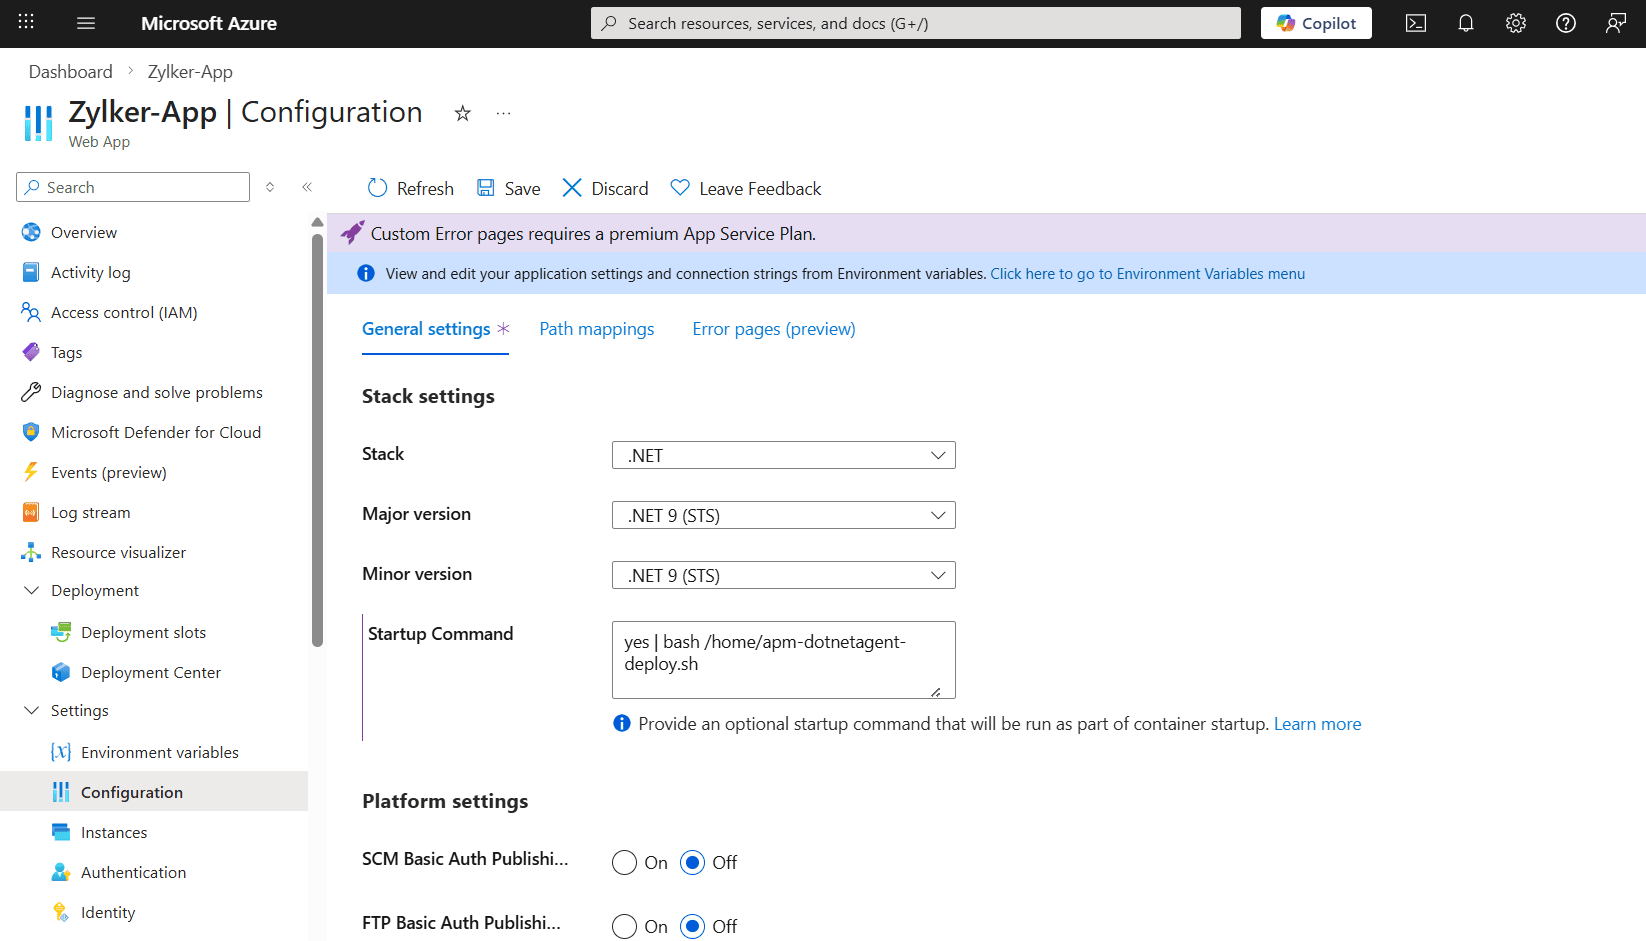
Step 2: Modify the Startup command
- Open the Azure Portal.
- Navigate to your Web App.
- Go to Settings > Configuration.
- Under the General Settings tab, locate the Startup Command field.
- Enter the following command:
yes | bash /home/apm-dotnetagent-deploy.sh
- Click Save.
Step 3: Restart the Web App
After updating the startup command:
- In the Azure Portal, navigate to your Web App.
- Click Restart.
Go to your Site24x7 APM Insight dashboard and check if the application appears.
Using NuGet package and App Settings
Install the .NET agent by adding the NuGet package and configuring required environment variables in Azure App Service.
- Add the NuGet package Site24x7.APMInsight.Agent to your .NET project using your preferred method (e.g., Visual Studio NuGet Manager or CLI).
- Build and publish the application to your Azure App Service (Linux).
- In the Azure portal, navigate to your App Service.
- Go to Settings > Configuration > App settings.
- Click + Add and add the following environment variables:
CORECLR_ENABLE_PROFILING=1
CORECLR_PROFILER={9D363A5F-ED5F-4AAC-B456-75AFFA6AA0C8}
CORECLR_PROFILER_PATH_32=/home/site/wwwroot/site24x7/x86/libClrProfilerAgent.so
CORECLR_PROFILER_PATH_64=/home/site/wwwroot/site24x7/x64/libClrProfilerAgent.so
DOTNET_STARTUP_HOOKS=/home/site/wwwroot/site24x7/netstandard2.0/DotNetAgent.Loader.dll
DOTNETCOREAGENT_HOME="/home/site/wwwroot/site24x7"
MANAGEENGINE_COMMUNICATION_MODE=direct
S247_LICENSE_KEY=YOUR_LICENSE_KEY_HERE
SITE24X7_APP_NAME=<monitor name>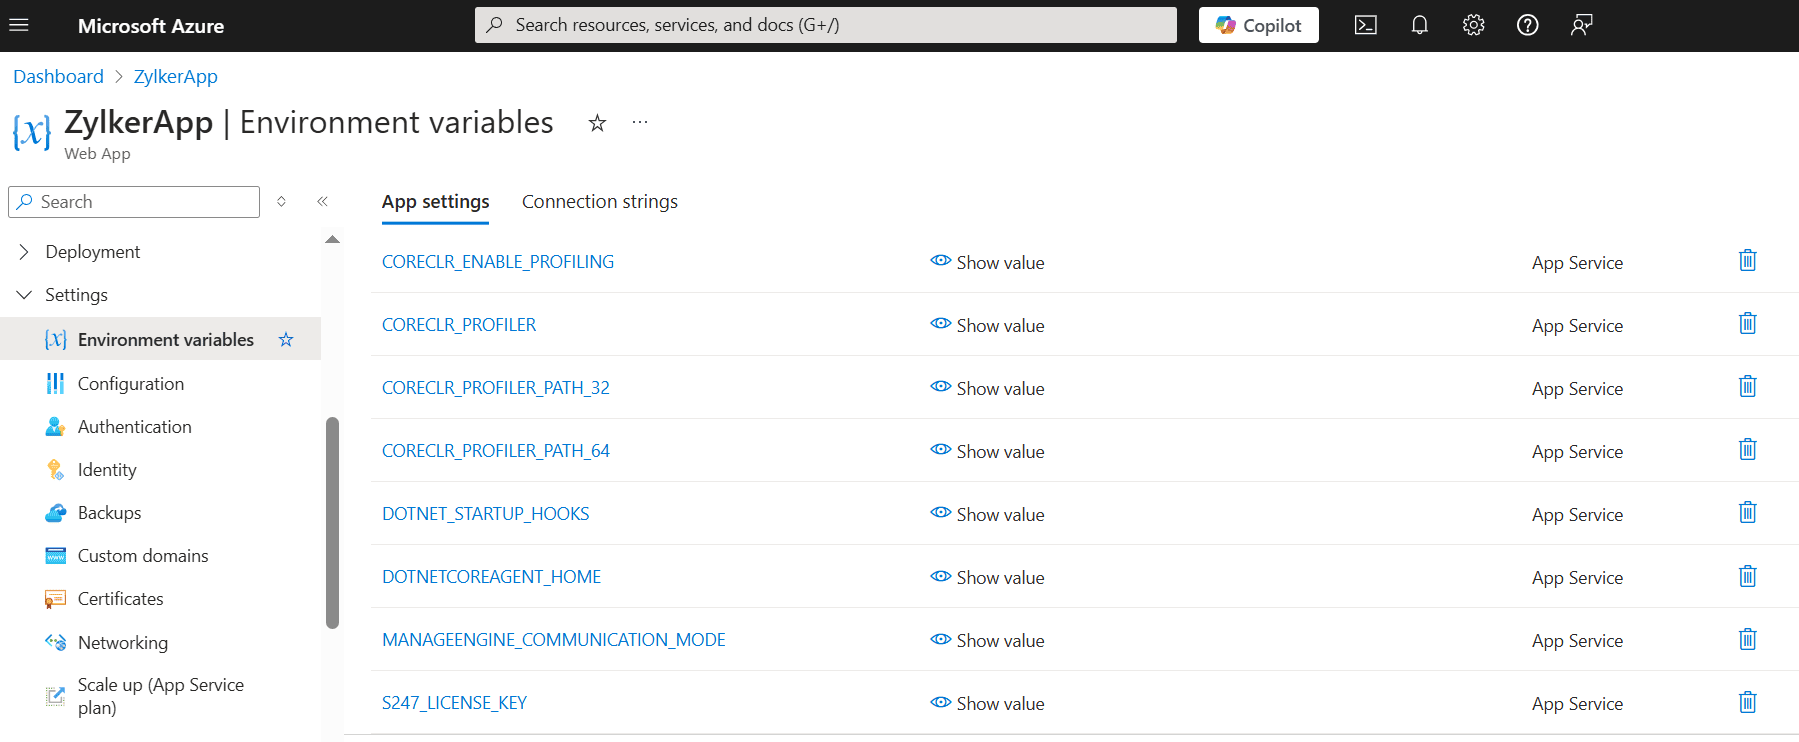 Note
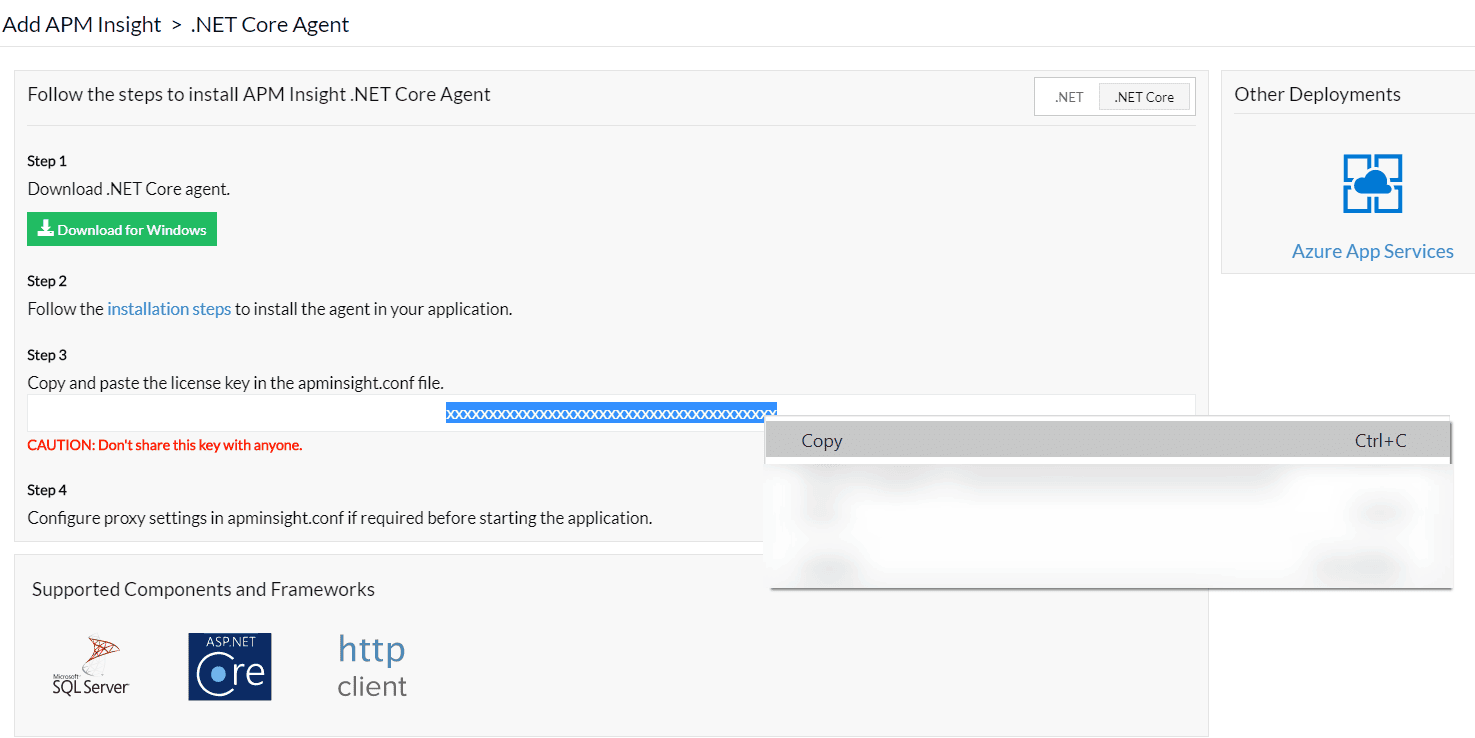
NoteReplace YOUR_LICENSE_KEY_HERE with your actual license key copied from the Site24x7 portal.
- Click Save to apply the changes.
- Restart the App Service to apply the newly configured environment variables.
- Once the app is restarted, perform a few transactions to generate traffic.
Ensure that all environment variables are set exactly as listed. Incorrect paths or missing variables can prevent the agent from functioning properly.