Azure Log Analytics workspace integration
An Azure Log Analytics workspace is a centralized log management solution that enables you to collect, analyze, and query log data across your cloud and on-premises environments.
By integrating Site24x7 with an Azure Log Analytics workspace, you can forward Site24x7 logs and monitoring events to Azure, allowing you to perform advanced analytics, build dashboards, and configure alerts within Azure.
Key capabilities of the integration
This integration provides the following capabilities:
- Site24x7 logs are sent to the Azure Log Analytics workspace for centralized storage.
- Logs can be queried using Kusto Query Language (KQL) for deeper analysis.
- Enables correlation with other Azure logs and resources.
- Facilitates unified monitoring across multiple systems.
Prerequisites for Azure Log Analytics workspace integration
- You need a valid and active Azure account with a Log Analytics workspace created.
- Ensure you have the required permissions to configure data ingestion for the workspace. For more details, please check here for permissions.
- Create a credential profile in Site24x7 with the Azure workspace authentication details before setting up the integration.
Configuring the Azure Log Analytics workspace side of the integration
- Log in to the Microsoft Azure portal.
- In the search bar, enter log analytics workspaces and select it from the results.
- Select the Log Analytics workspace you want to connect to Site24x7.
- On the workspace Overview page, copy the Workspace ID. You'll need this value when configuring the integration in Site24x7.
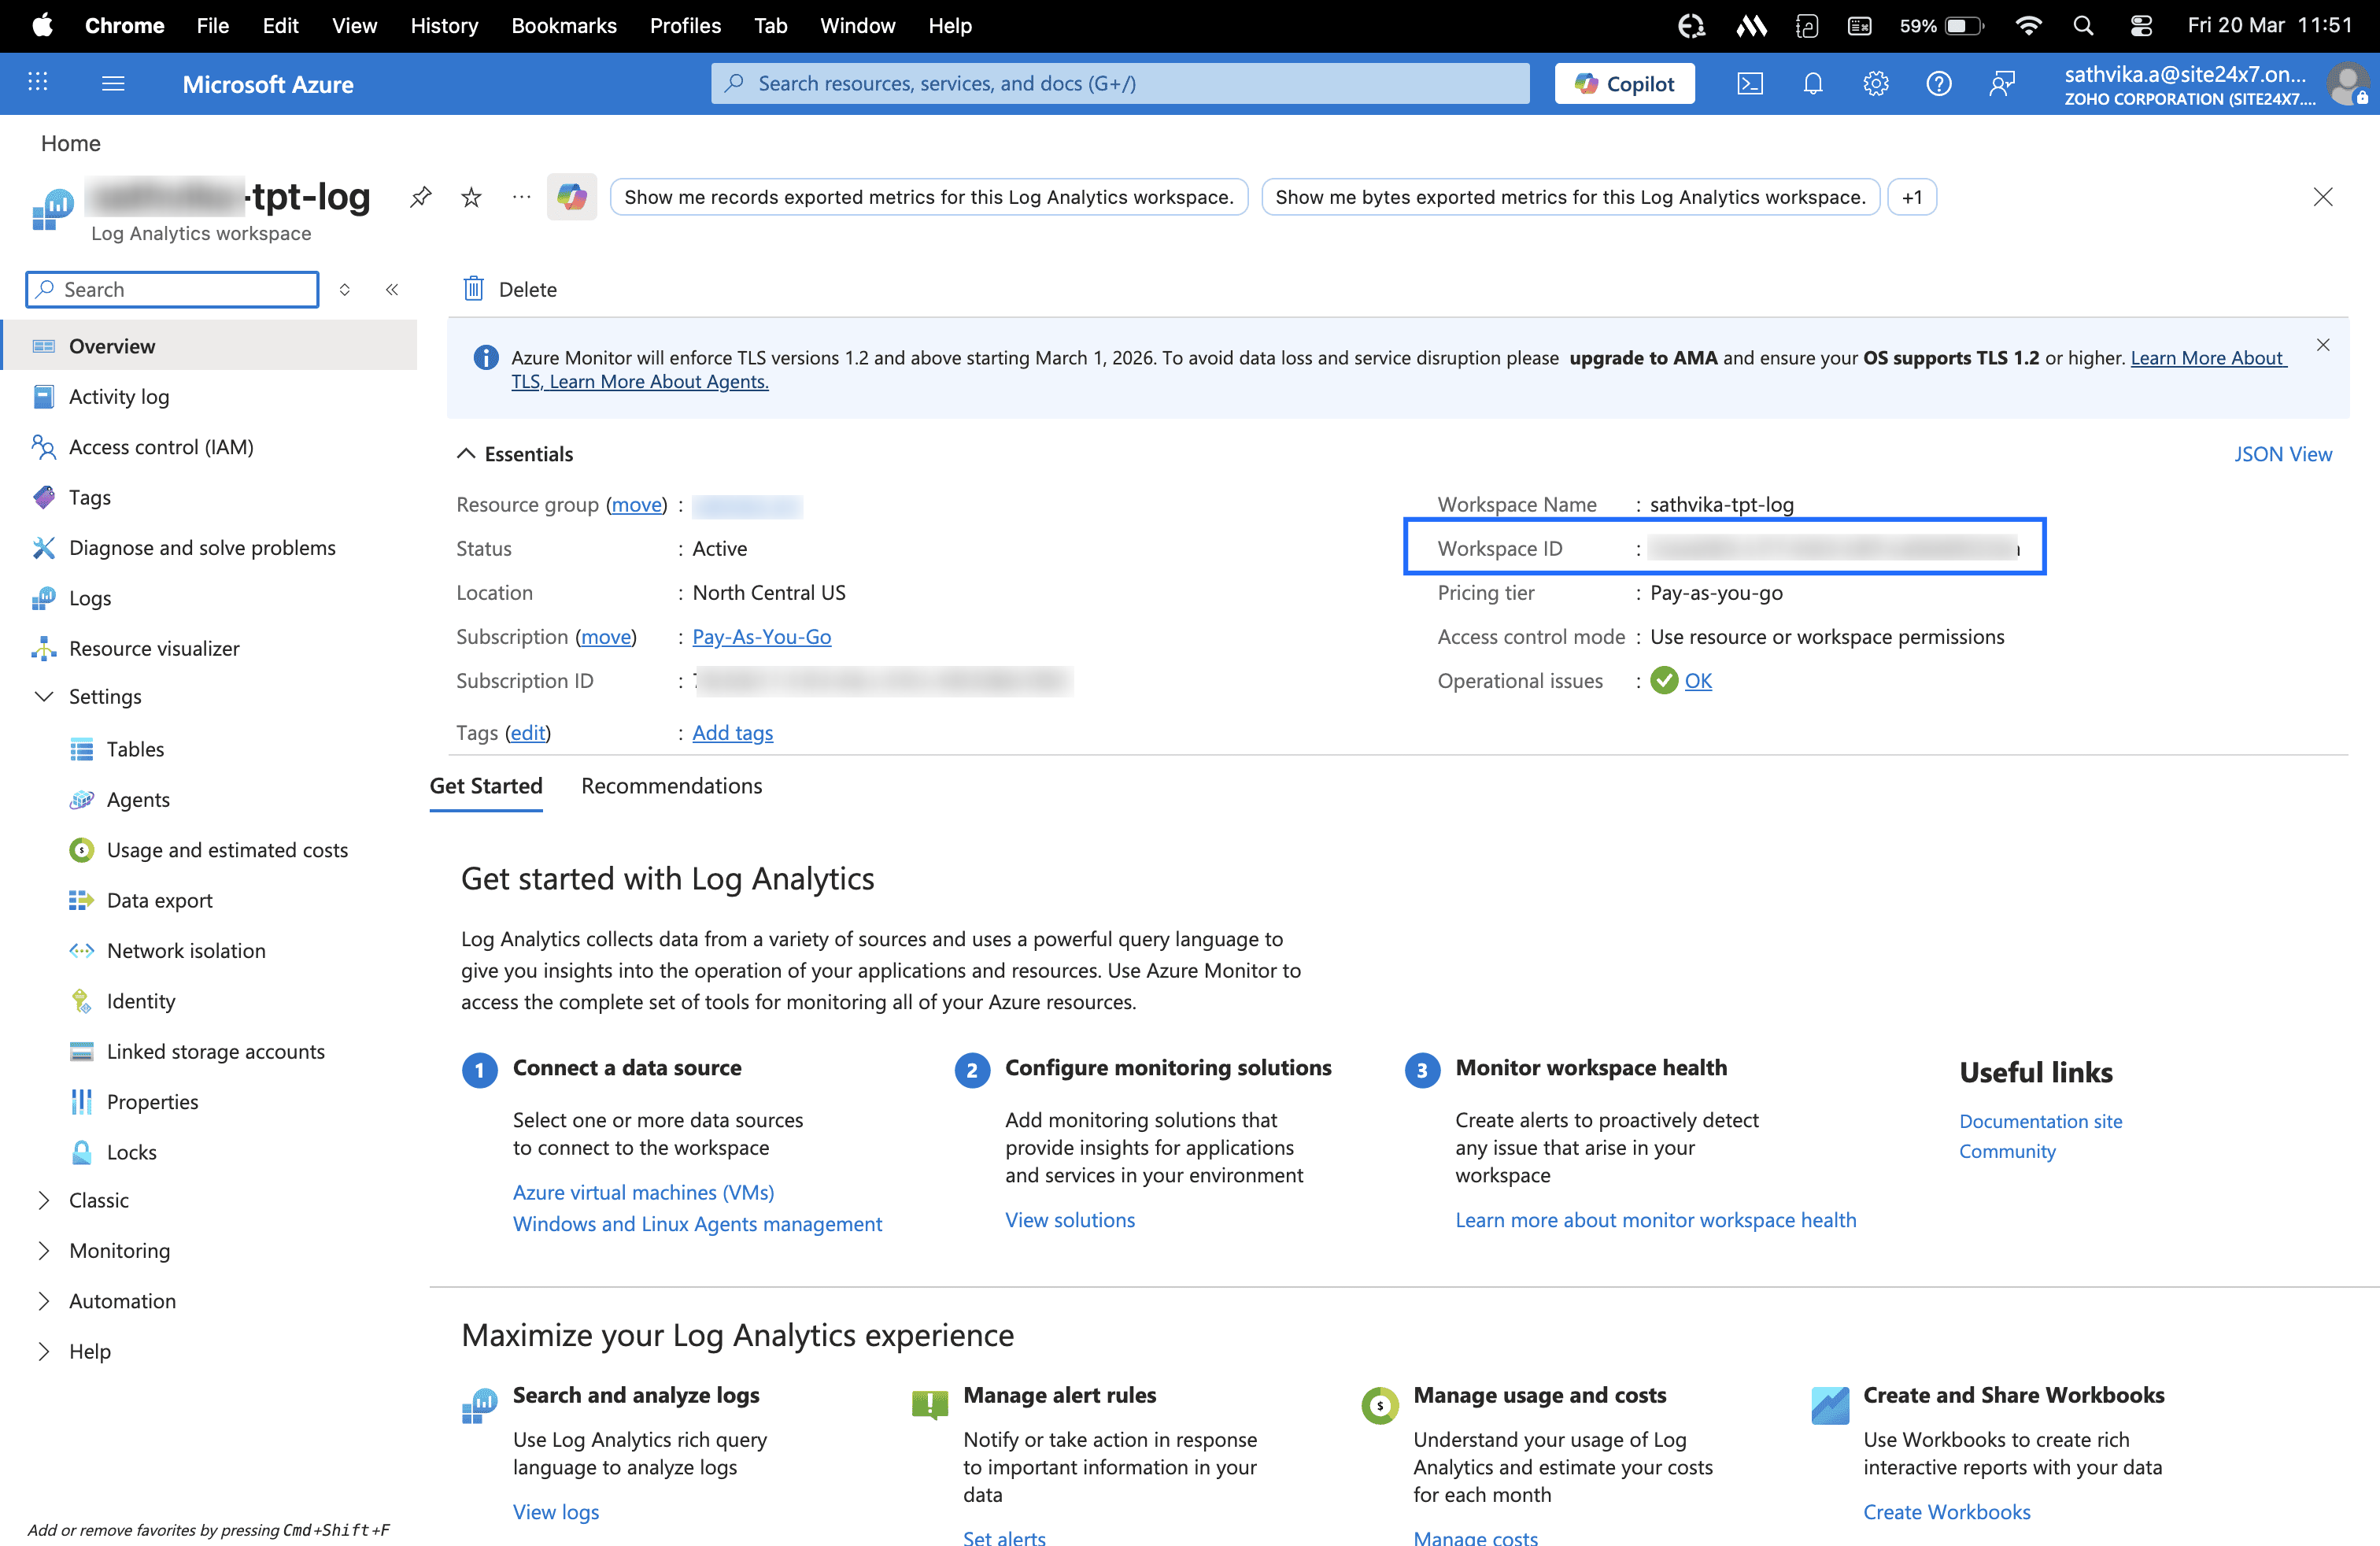
- Go to Access control (IAM) for the workspace and verify that your service principal has the Reader role. If not, click Add role assignment and assign the Reader role to the appropriate service principal.
- Keep your service principal credentials secure. Do not share client secrets or store them in plaintext.
- If you do not have an existing workspace, create a new workspace in Azure Log Analytics.
Configuring the Site24x7 side of the integration
- Log in to Site24x7.
- Navigate to Admin > Third-Party Integrations. Click Add Third-Party Integrations and choose Azure Log Analytics Workspace.
- Provide the required details:
- Integration Name: Enter a unique name to identify this integration.
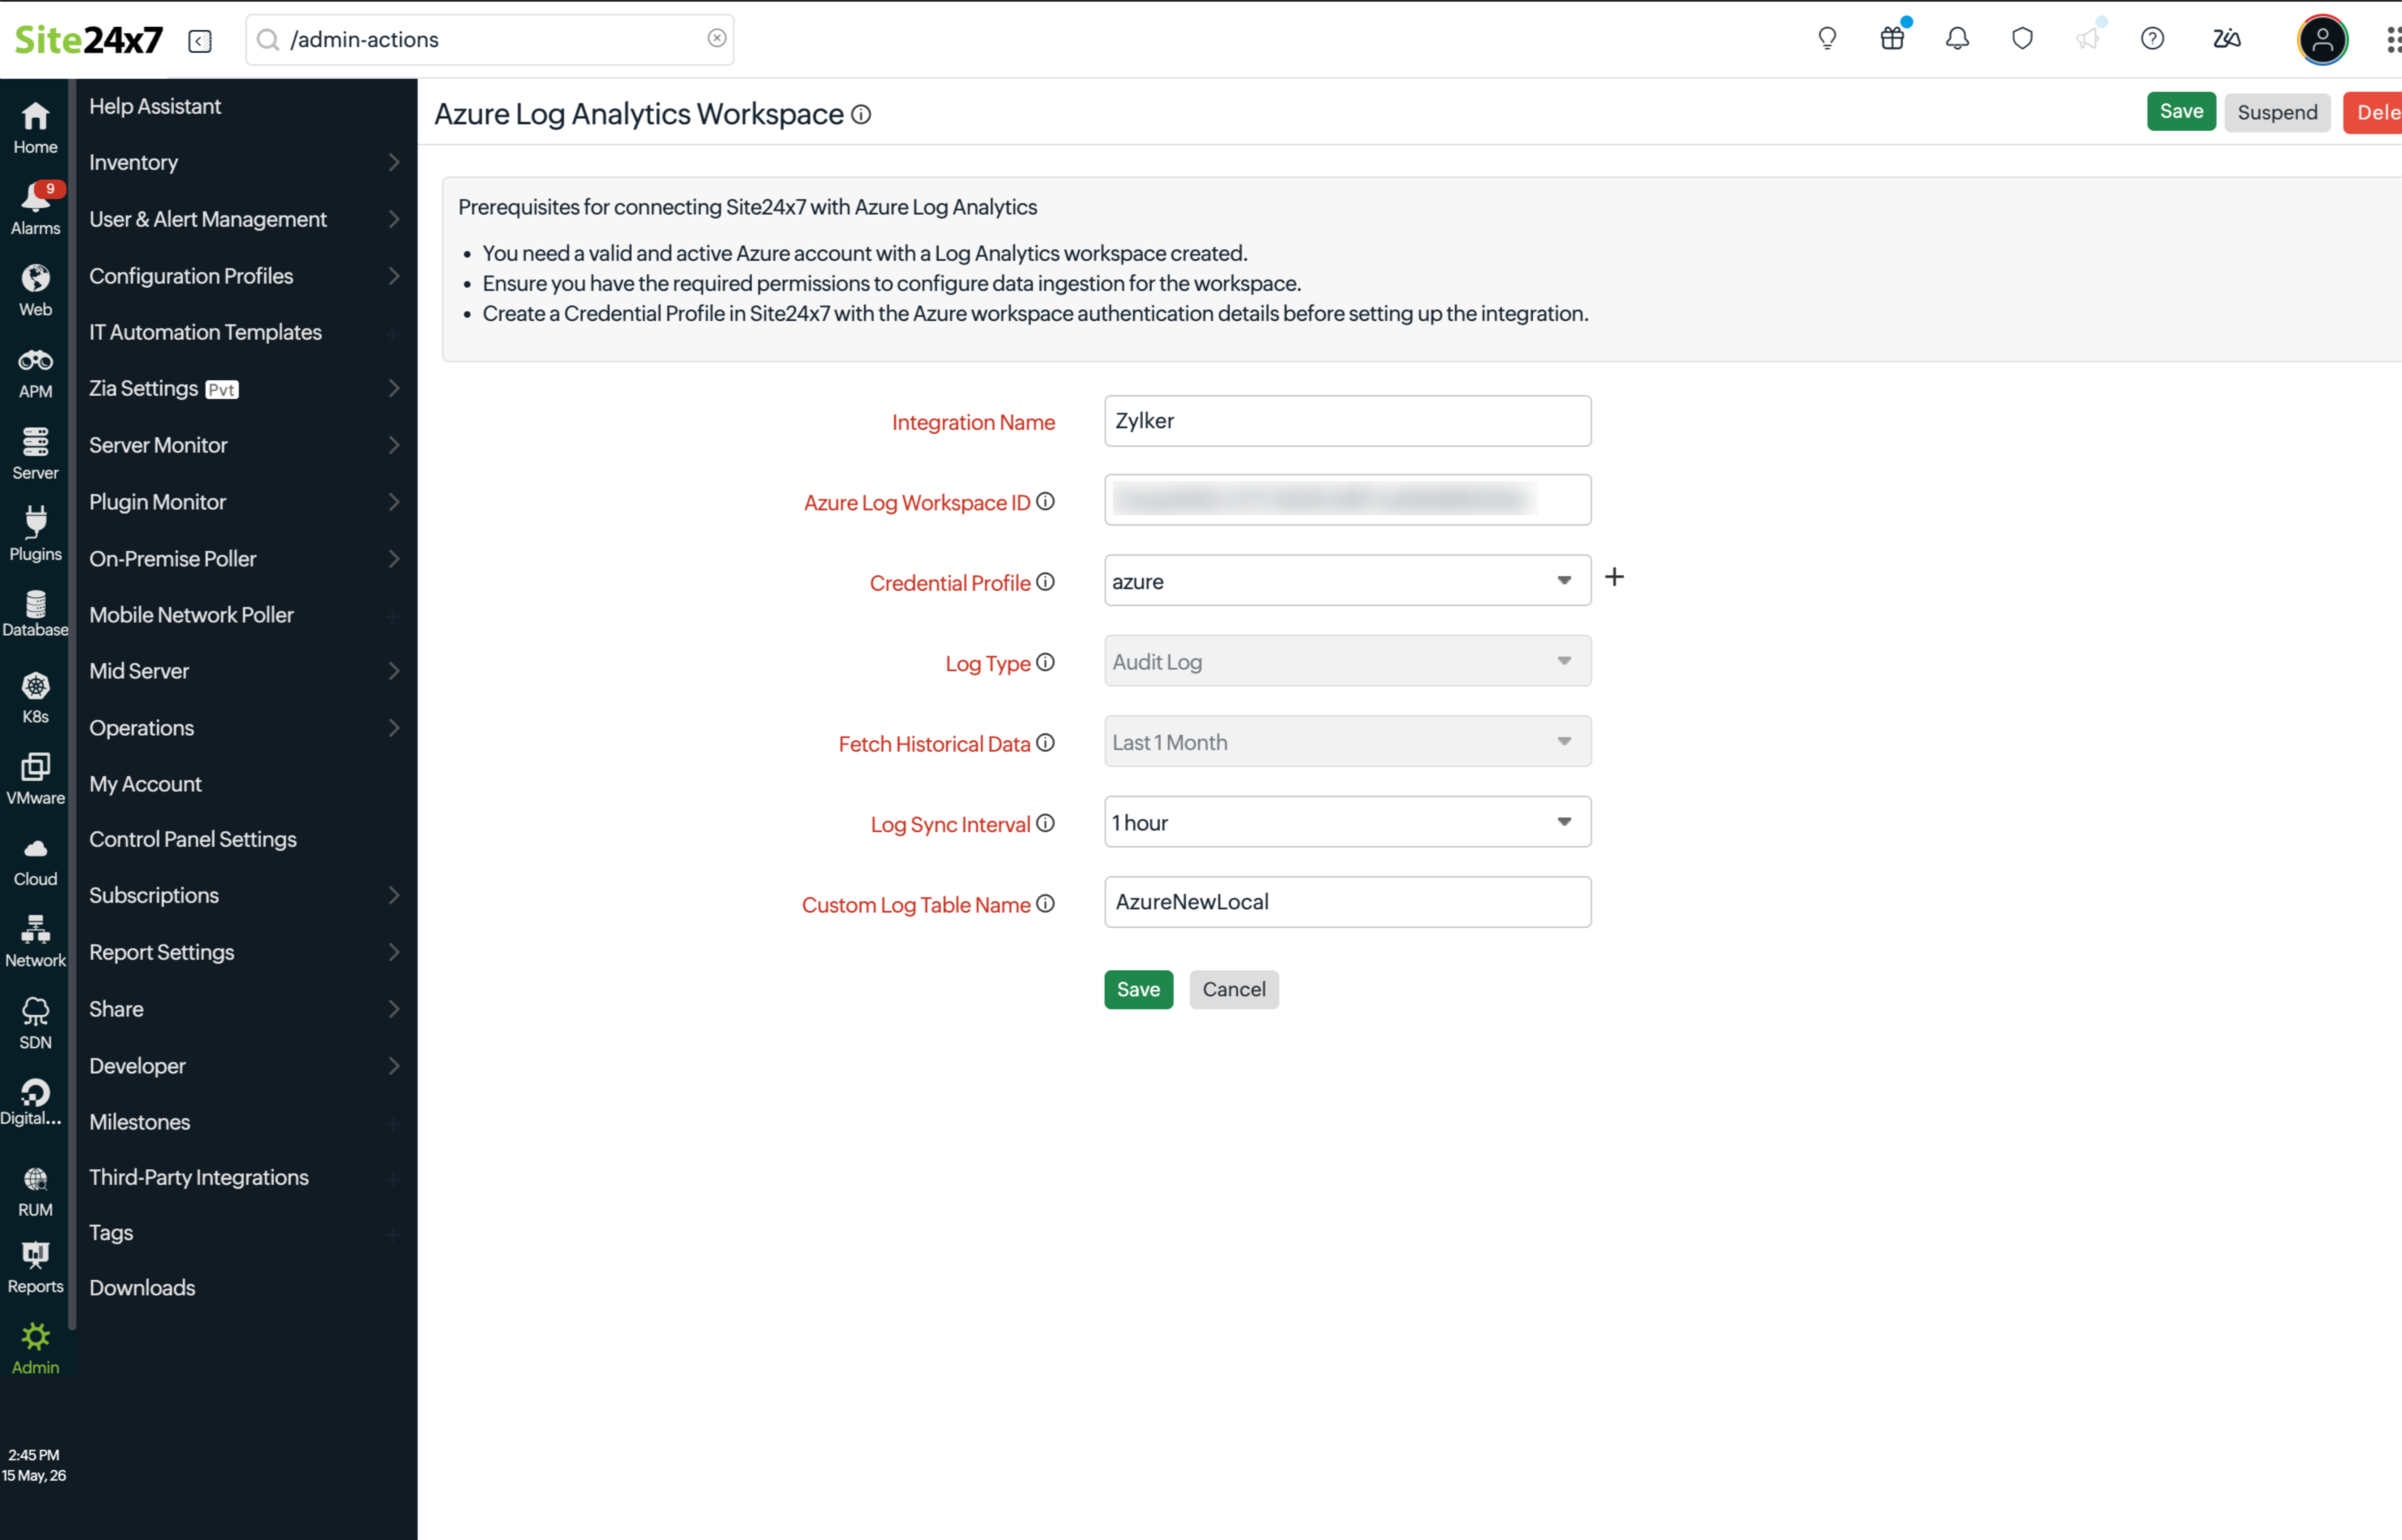
- Workspace ID: Provide the Log Analytics workspace ID copied from the Azure portal. Site24x7 uses this value to connect to and collect data from the correct workspace. Learn more about fetching the workspace ID from the Azure portal.
- Credential Profile: Select the Azure credential profile to authenticate with your Azure account. Click + to create a new credential profile if one doesn't already exist.Provide the workspace primary key as the API Access Token. You can generate this key using the Azure CLI command below for your Log Analytics workspace.
Command: az monitor log-analytics workspace get-shared-keys --resource-group
--workspace-name --query "primarySharedKey" - Primary Shared Key: Use the Workspace Primary Key as the API Access Token to configure secure authentication for all customers under your MSP account. Once you add the key in the MSP Admin profile, it will automatically be applied to all associated customer accounts.
You can retrieve the Workspace Primary Key using the Azure CLI command.
NoteThis field is available only for MSP users who do not have a credential profile.
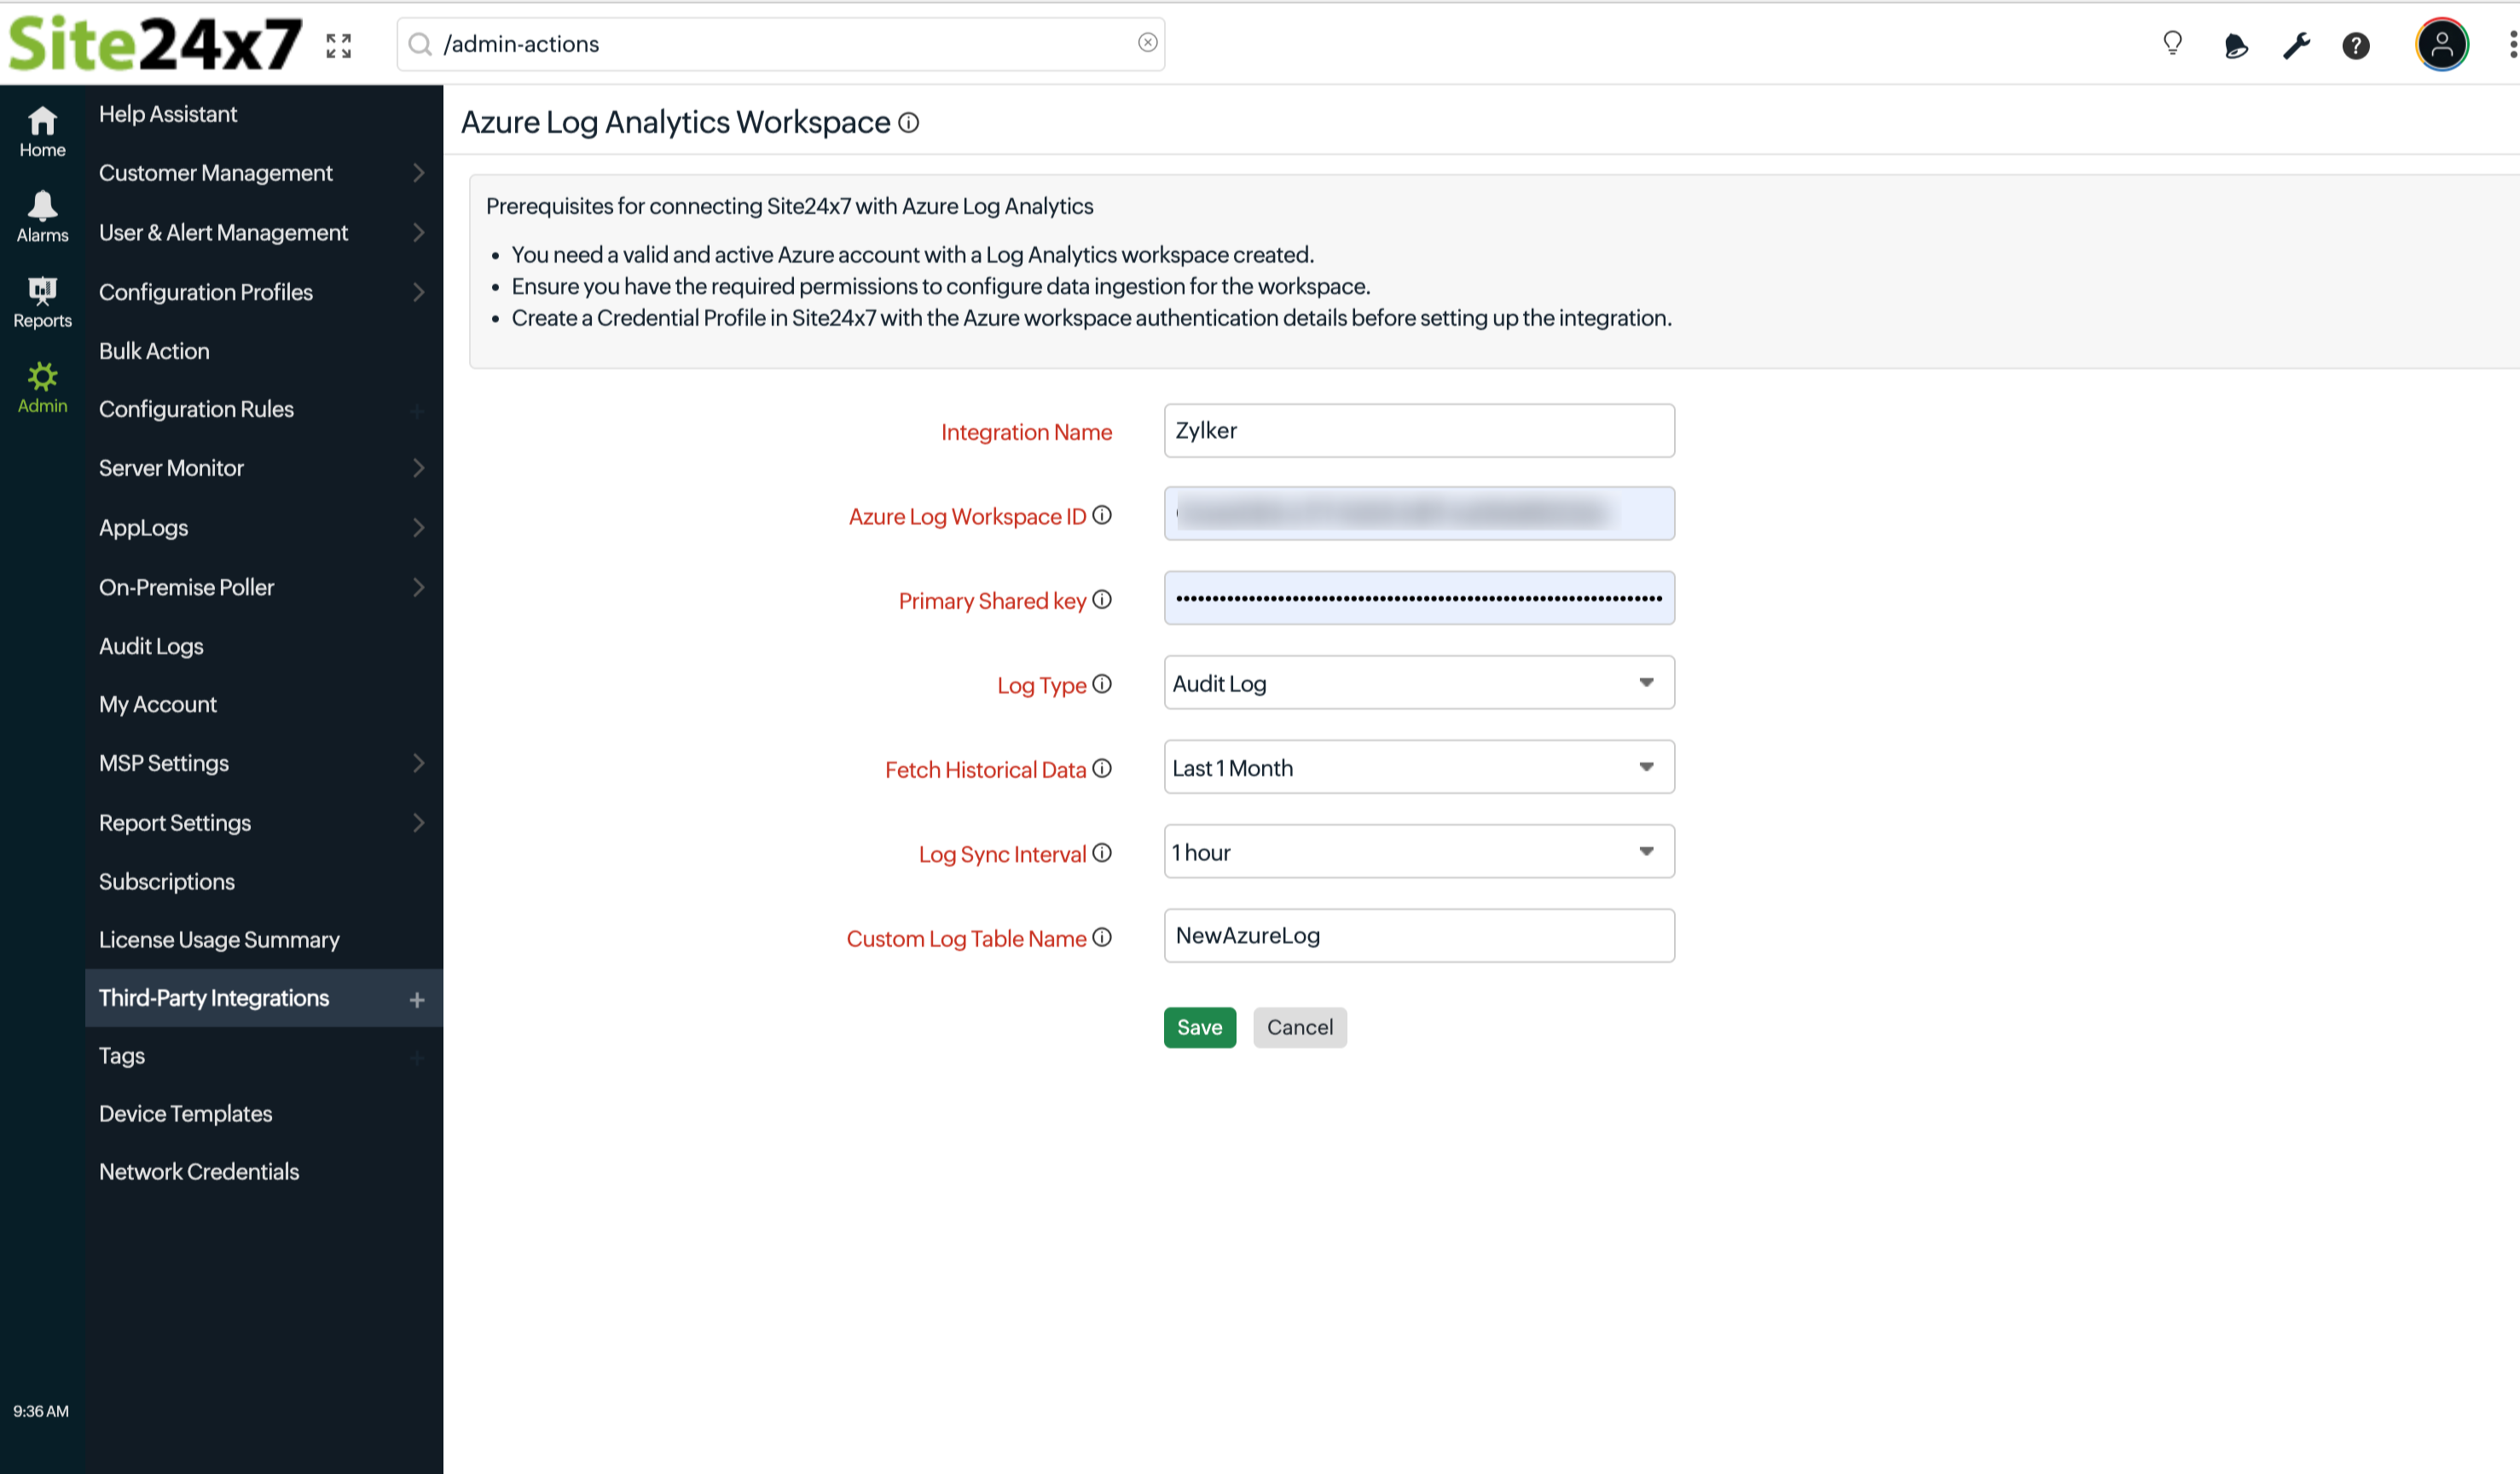
- Log Type: Select the type of logs to transfer from your Site24x7 Azure workspace.
- Audit Log: Collects audit trail events, such as user sign-ins, resource access, and configuration changes. Use this option to share the details to the Azure portal.
- Fetch Past Data Duration: Select the time range from which past log data should be fetched on the initial sync. The default value is Last 1 Month.
- Log Sync Interval: Select how frequently Site24x7 should sync data from your Azure workspace.
- Custom Log Table Name: Specify the table name that will be created in the Azure Log Analytics workspace (e.g., Site24x7_CL ).Ensure that the table name follows Azure naming restrictions and conventions. For more information, refer to the Microsoft documentation on naming restrictions.
- Integration Name: Enter a unique name to identify this integration.
- Click Save and Test to validate the connection, or click Save to save the configuration.
When you update an integration configuration and click Save or Save and Test, Site24x7 displays a review page that highlights the modified fields. You can click View Diff to compare the updated configuration with the existing configuration and verify the changes before proceeding.
Suspend, activate, or delete the Azure workspace integration
Suspend the integration
- Log in to Site24x7.
- Navigate to Admin > Third-Party Integrations.
- Click the hamburger icon
 next to the Azure workspace integration.
 - Select Suspend.
Suspending the integration stops Site24x7 from syncing data into your Azure workspace. The integration configuration is preserved and can be reactivated at any time.
Activate the integration
- Log in to Site24x7.
- Go to Admin > Third-Party Integrations.
- Click the hamburger icon next to the Azure workspace integration.
- Select Activate.
Activating the integration resumes the sync of data from your Azure workspace based on the configured sync interval.
Delete the integration
- Log in to Site24x7.
- Go to Admin > Third-Party Integrations.
- Click the hamburger icon next to the Azure workspace integration.
- Select Delete.
Deleting the integration permanently removes it from Site24x7. This action can't be undone.