Adding a VMware VeloCloud SD-WAN monitor
-
Log in to your Site24x7 account.
-
Navigate to SDN > VeloCloud SD-WAN and click the plus + icon beside VeloCloud SD-WAN or click the Add VMware VeloCloud SD-WAN button on the Help Assistant page. Alternatively, navigate to Admin > Inventory > Add Monitor > click VMware VeloCloud SD-WAN.
-
Provide the following details:
-
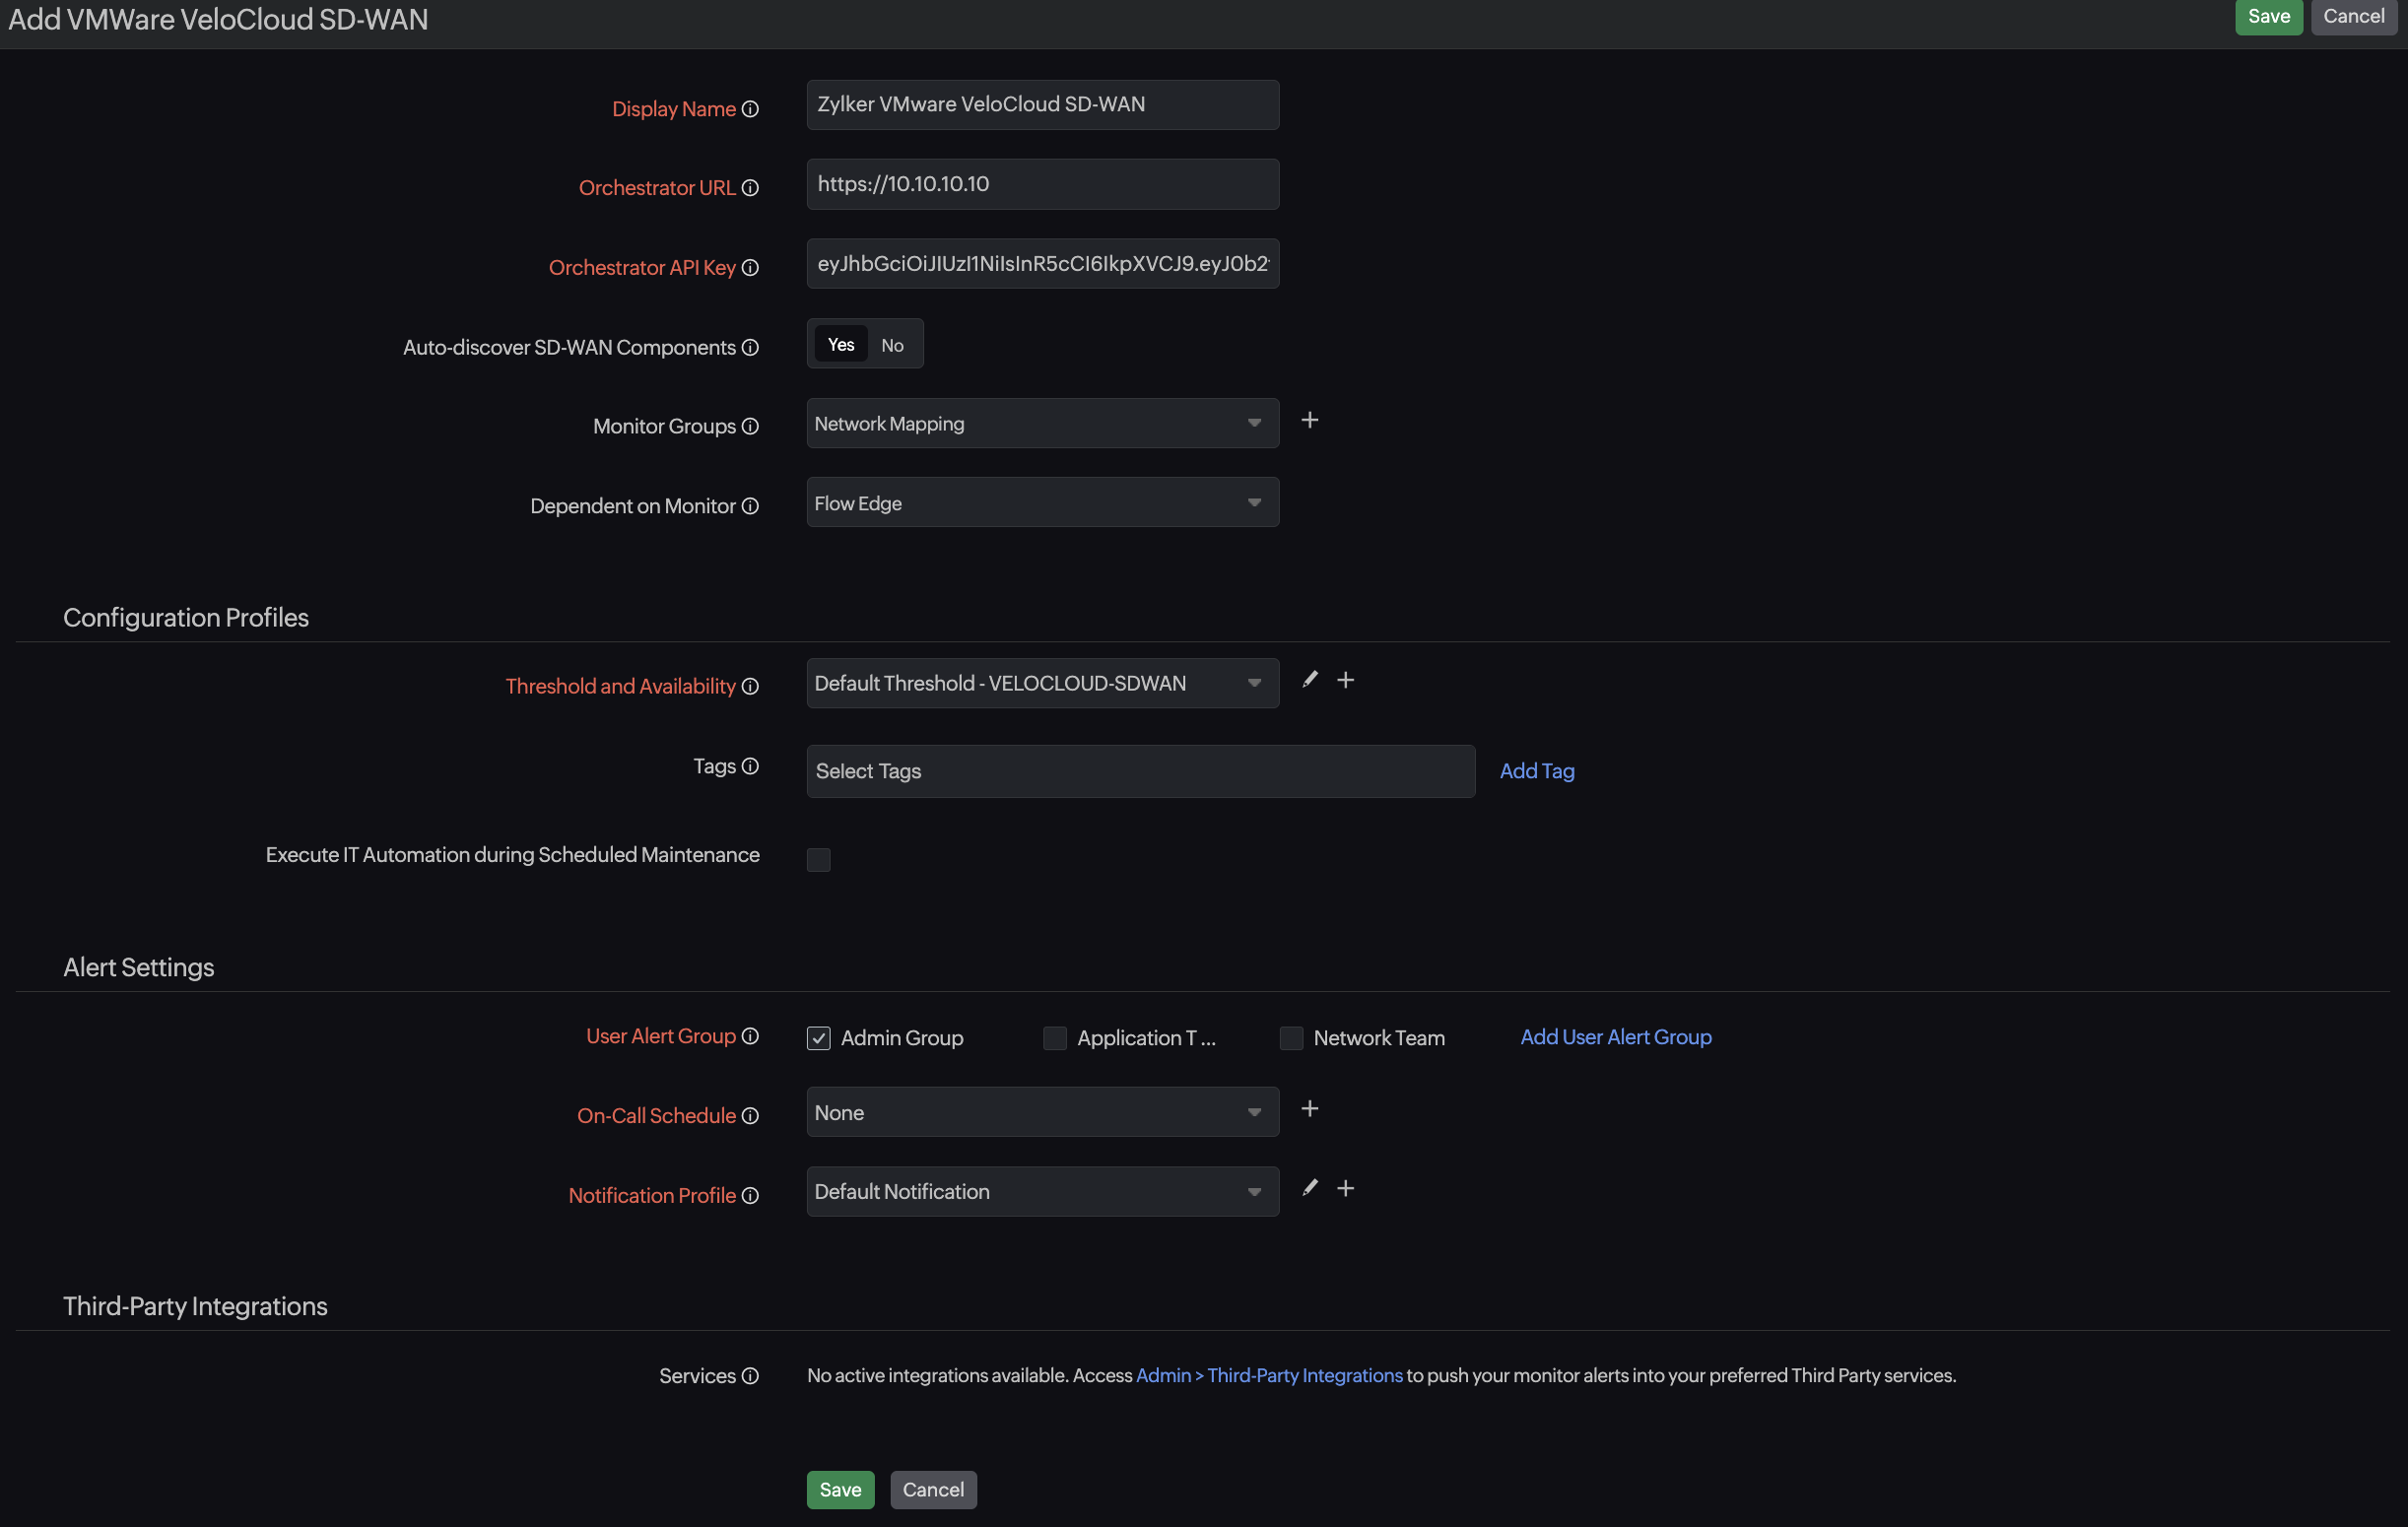
Display Name: Provide a name to identify this monitor in the dashboard.
-
Orchestrator URL: Provide the VMware VeloCloud SD-WAN Orchestrator URL or IP Address with a http:// or https:// prefix. Example: https://vco.velocloud.net
-
API Key: Provide an orchestrator API key with read-only privileges that has access to all the customers you wish to monitor.
- Auto-discover SD-WAN Components: Select Yes to discover all customers, edges, and links within the VMware VeloCloud SD-WAN to gain a comprehensive view of your network’s status and performance. If you select No, you will have the option to manually add the customers and edges.
-
Monitor Groups: Select an existing monitor group or create a new one by clicking the plus + icon.
-
Dependent on Monitor: Select a dependent monitor. Alerts will be sent based on the down status of the selected monitor.
-
In the Configuration Profiles section, enter values for the following fields:
-
Threshold and Availability: Select an existing profile from the drop-down, edit it by clicking the pencil icon
 beside the field, or add a new one.
 -
Tags: Select one from the existing tags or click Add Tag beside the field to add a new one.
-
Execute IT Automation during Scheduled Maintenance: Click the check box to enable this option.
-
In the Alert Settings section, provide the values for the following fields:
-
User Alert Group: Select the groups that must be notified when there's an alert.
-
On-Call Schedule: Select an On-Call Schedule to send alerts to users available during a particular shift from the drop-down, or click the plus + icon beside the field to add a new one.
-
Notification Profile: Select a value to specify to whom or how the notifications must be sent. You can edit an existing Notification Profile by clicking the pencil
 icon, or click the plus + icon to add a new one.
 -
In the Third-Party Integrations section, you can select the Services to which the alarms must be sent.
- Click Save. The SD-WAN will now be added as a monitor if you have selected Yes for Auto-discover SD-WAN Components. If you have selected No, then you will can add customers and edges by following the next steps.
- In the next screen, you can select a customer and the edges present as monitors. Then, click Next.
-
Select the edges present in the customer account that must be added as monitors. Then, click Discover.
-
The SD-WAN, the customers within it, and the edge devices selected within the customer account will be added as monitors.
-
To discover customers after adding the VMware VeloCloud SD-WAN monitor, navigate to SDN > VeloCloud > VeloCloud SD-WAN > Select a monitor. Then, navigate to Customers tab and click Discover at the top-right of the table.
-
To discover edges after adding the VMware VeloCloud SD-WAN monitor, navigate to SDN > VeloCloud > VeloCloud SD-WAN > Customers. Then, navigate to Edges tab and click Discover at the top-right of the table.