A WordPress website may need to be moved to a new hosting provider or to a new hosting server. This usually happens when a new hosting provider is more economical or provides additional features that are needed for a website. These additional functionalities could be available in a new environment or on another hosting server.
The migration to a new hosting provider is simply about copying files to the correct folders and ensuring that the configuration settings are in line with the new server’s name (IP address) and folder structure. The challenges with migration include downtime caused by website features not functioning due to configuration files that need to be redirected to point at the current server or host, missing files, or unsupported customized code. Let’s look at how to perform a migration of a basic WordPress website from one hosting provider to another.
Migrating is a three-step process:
A word on plugins: You may consider using plugins as a tool to migrate from one WordPress site to another. Some plugins available on WordPress allow you to back up a site and restore it to a new location. You’ll want to review specific documentation from the plugin providers to check for the most suitable one for your current and planned hosting environments. Some examples of WordPress backup or migration plugins currently supported include:
| Brand or product name | Features | Publisher |
|---|---|---|
| Migrate Guru | Migrate and clone WordPress sites. Powered by BlogVault, this product uses processes on its own servers. It automatically rewrites URLs, bypasses import-export scripts, and handles serialized data. This product can also clone WordPress sites without any manual work, add-ons, or additional tools. |
Migrate Guru - https://www.migrateguru.com/. |
| WPvivid Backup Plugin |
Migrate a copy of a WordPress site to a new host (a new domain), schedule backups, send backups to remote storage, and perform migration. |
WPvivid Team - https://wpvivid.com/ |
| All-in-One WP Migration |
Export a WordPress website, including the database, media files, plugins, and themes. This plugin supports uploading a site to a different location with a drag and drop into WordPress. There is an option to apply an unlimited number of find and replace operations on your database during the export process. The plugin will also fix any serialization problems that occur during the find or replace operation. |
ServMask - https://servmask.com/ |
| WP Migrate DB – WordPress Migration |
Export and migrate your database. Each migration takes shape in the form of a three-step process: find and replace the data, export the SQL, and import into a new database. This product fully supports serialized data and arrays and can find and replace content within serialized arrays. It handles serialized data by un-serializing the data and going through it, identifying strings, and running a find and replace operation on them. Once the product has gone through all the data, it serializes it again and sticks it back in the database. |
Delicious Brains - https://deliciousbrains.com/ |
There are multiple possible actions to be done during this step based on the hosting provider’s supported capabilities. These include:
1.1 Using the “Back up/Download” option to back up website files: Copy and download the existing website files. This is done via the SFTP client. Navigate to the WordPress root folder, which contains the files of the website. It could be called public_html or www, or a customized name may have been used (for example, your site name). Make sure you have enabled the option to view hidden files.
Download the selected files to your computer. Based on the size of your website file, this could take some time. The backup of files and folders, including any images used, is needed to allow your website to function. All the files you need are usually in the root folder.
Once the files are saved, back up the WordPress website database from your current website’s administrative panel.
1.2 Backing up the WordPress database would include the structure and locational and setting information for:
Using cPanel and phpMyAdmin: cPanel is an administrative interface that helps you manage your web hosting server. It has a web-based GUI to manage a website or server without the need to know and remember commands and other technical aspects. Within the cPanel GUI, phpMyAdmin is a program used to manipulate a WordPress database.
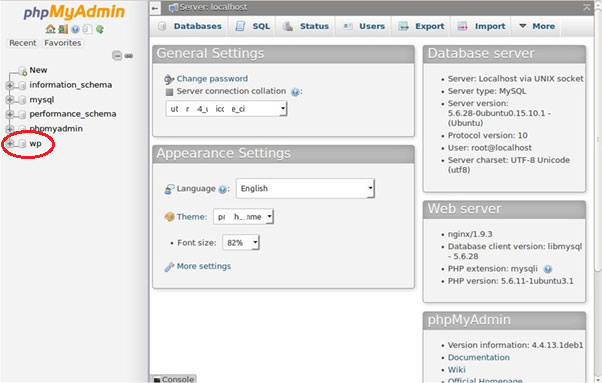
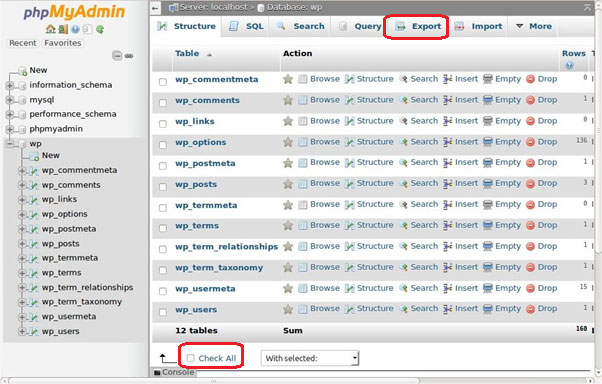
Log in to phpMyAdmin through cPanel. Select the WordPress database to be backed up. In the sample screenshot above, the database is wp. Once you’ve selected the database, the screen will display the WordPress database tables. While you have the option to select which tables from the database you need, if you’re unsure, select Check All so all the tables will be backed up. Click the Export tab on the top set of tabs.
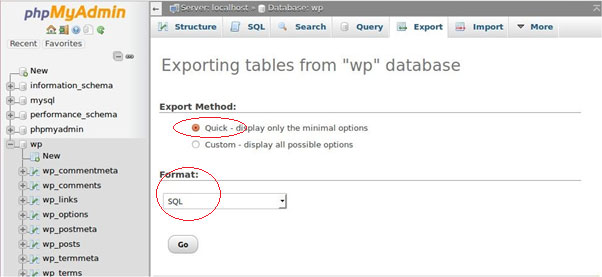
Since we plan to back up the complete database, choose the Quick option and click Go on the Export Method screen.
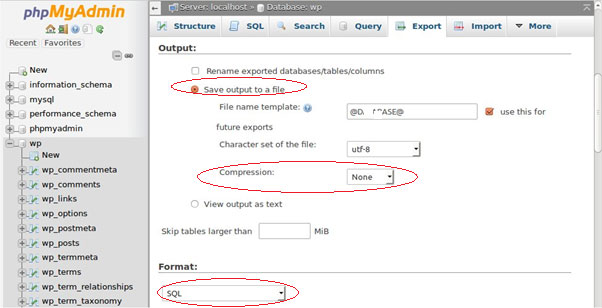
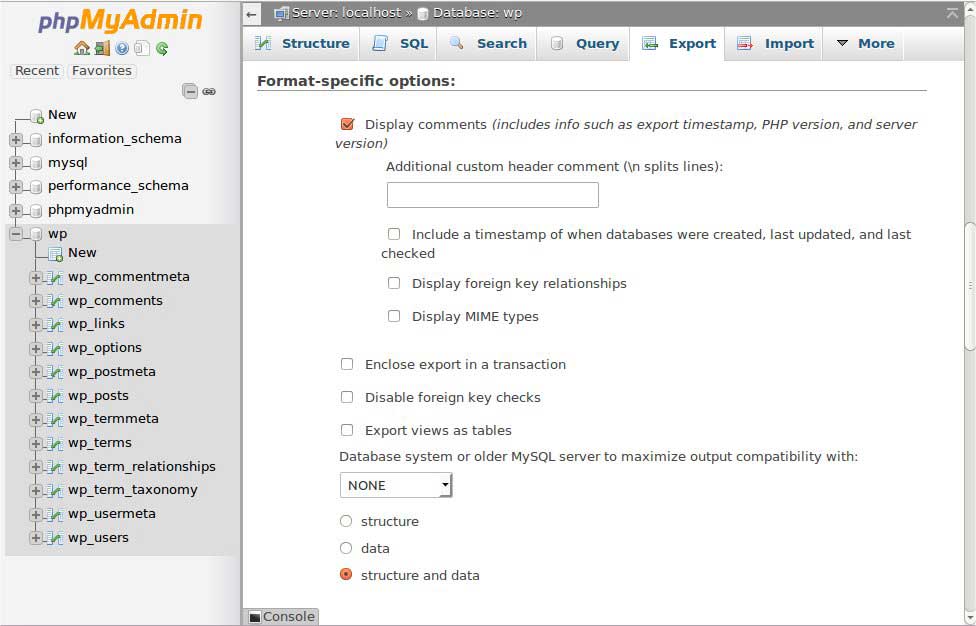
The next screen, Output, will enable you to select how you’d like to output or export to a file. You can select zipped under Compression. Under Format, select SQL.
On the Format-specific options screen, allowing the defaults to remain as shown in the snapshot below should work for most purposes.
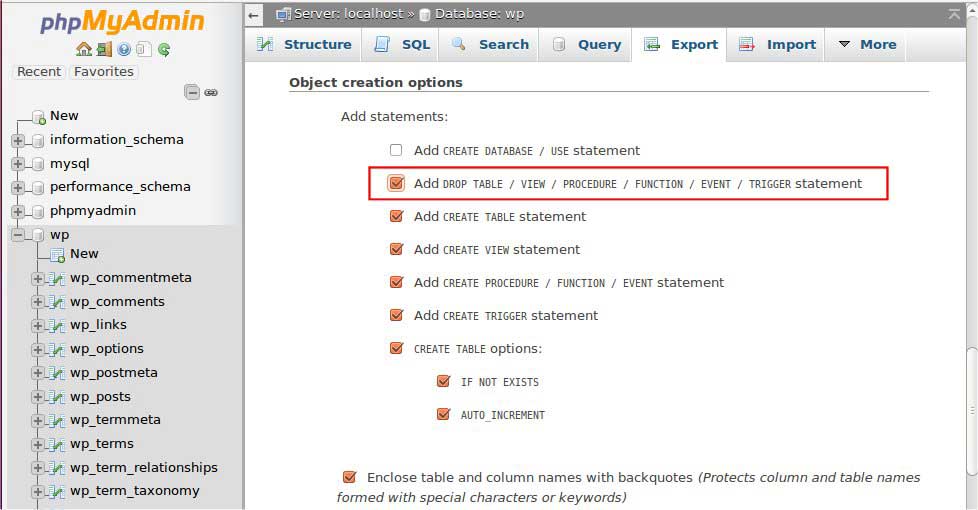
Next, the Object creation options screen allows setup selection for format-related choices. Select the options as shown in the screenshot below. The Add DROP TABLE / VIEW / PROCEDURE / FUNCTION / EVENT / TRIGGER statement will, prior to table creation on the target database, call the DROP statement to delete the old table if it exists.
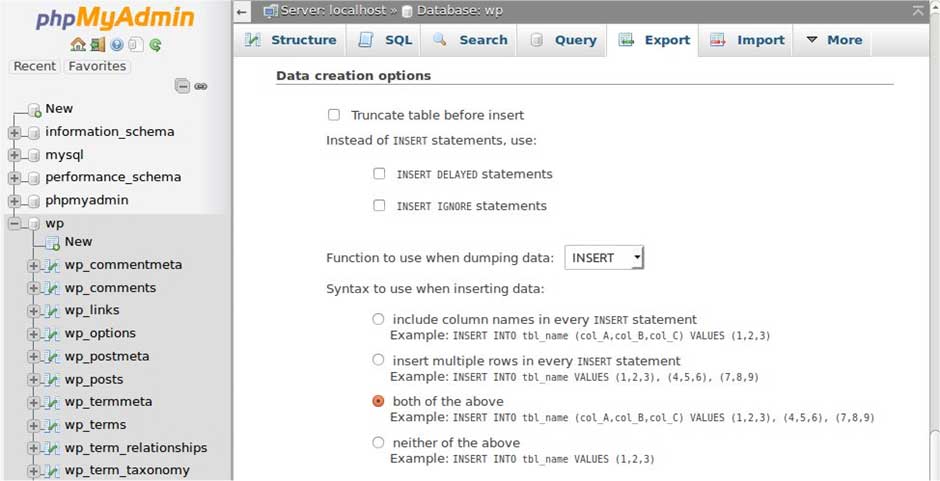
On the Data creation options screen, use the default choices shown below. Click Go.
You should be prompted with a file to download. Save the file to your computer. Depending on the database size, this may take some time.
You have now backed up the WordPress database that contained the website structure/layout, templates, user accounts, theme and plugin settings, posts, and comments.
2.1 Restoring files: The downloaded files from the existing website must now be uploaded to the designated root folder of the new WordPress website server. This is done via the SFTP client. Navigate to the WordPress root folder, which is set up to contain the files of the website. It could be called public_html or www, or it might be a customized name (e.g., your site name).
Upload the selected files from your computer. Based on the size of your website file, this could take some time. Once the files are restored/copied into the root folder, restore the WordPress website database from your new website’s administrative panel.
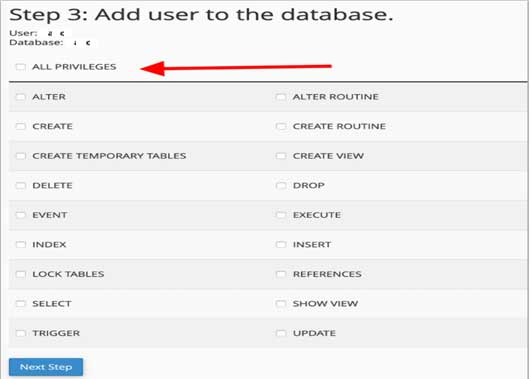
2.2 Restoring the WordPress database includes creating a new SQL database and importing the old database. From cPanel, access phpMyAdmin. Create a new database.
Add a user to it, using a predetermined username and password that meet appropriate security requirements. Give this new user complete database access and privileges.
After the new database is created on the new web host, import the backup database file that was downloaded from your old database. Go to the Import tab within the new database and upload the .sql file you generated earlier. This import will override the contents of the new one.
Getting the new website to work will require you to make changes to the new site’s configuration file. From the SFTP client, access the root folder of the new website. The default config file could be wp-config.php. In the SFTP client, right-clicking should give you a View/Edit option.
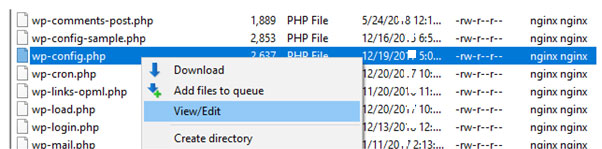
The file should open into a local text editor. Update the new database name as well as the new database admin user and password that you created:
              define('DB_NAME, 'db_name');

              define('DB_USER, 'db_user');

              define('DB_PASSWORD, 'db_pass');
Since this file is an upload from the migrated site, it will include values that point towards the old database. Note: Only the lowercase variables within an apostrophe are to be updated with the credentials of the new database. For example:
The new website files are now ready for functioning as a live website. Configure and change/map DNS settings to point from the old server hosted IP address/domain name to the new one.
Permalinks: If the new website has the same domain name as the previous one, the permalinks on the webpages should work fine. If the domain name has changed, WordPress will try to match the old URL with the relevant URL on the migrated site. Checking to ensure that these permalinks work can be done through broken-link checking plugins.
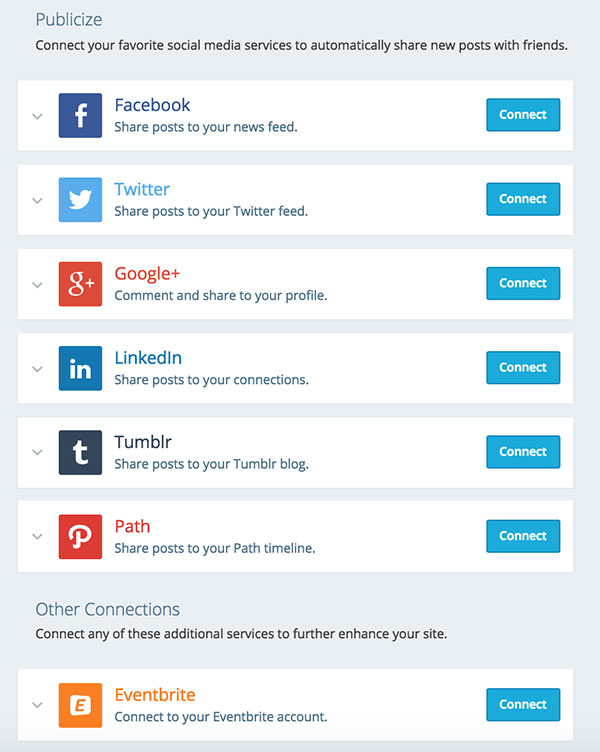
Reconnect social links: The final step would be to relink your social networks. This is done by going to My Sites > Marketing > Connections. Click Connect and follow the prompts to approve the connection:
We looked at how migrating a WordPress website is a three-step process of creating a backup, performing a restore, and testing the configuration. The migration is simply about copying files to the correct folders and ensuring that configuration settings are in line with the new server’s name (IP address) and folder structure. We looked at backing up and restoring the core files and the WordPress database. This was followed by making configuration changes/updates to point to the new website. Additionally, DNS settings and social media links need to be relinked. If done in a planned manner with an understanding of some basic hosting environmental details, the challenges of downtime can be avoided or at least minimized while migrating a WordPress website.
You can use Site24x7 to monitor both the old and new servers simultaneously to ensure zero downtime and verify that the new server performs correctly before switching DNS.
Yes, Site24x7 DNS Server Monitoring can query multiple global locations to verify that your DNS changes have propagated worldwide.
Site24x7 Web Page Analyzer can load your migrated pages and report broken resources or failed requests. You can also set up Website Monitoring for critical URLs to get alerted immediately if they return error status codes after the move.